Campervan food essentials to inspire your camping kitchen

Imagine a world without lists.

Even if you’re able to make regular escapes in your campervan or caravan, running through a quick checklist before you dash out the door will always pay dividends when you pull up at your destination.

Well fellow campervanners, it’s time for another list! And this time we’re talking campervan food.

Campervan Converts - campervan food, a stocked pantry

As much as I love the philosophy of hunting for fresh seasonal produce at little roadside huts, the doomsday prepper in me can’t leave civilisation until the campervan pantry is bursting with some bare essentials.

With a bit of creativity you can produce loads of meals just from these ingredients, or you can supplement with fresh fish, meat and extra veggies as you go along.

Campervan Converts - campervan food, Greek salad

Campervan Converts - campervan food, prawn stir-fry

Campervan Converts - campervan food, couscous

Campervan Converts - campervan food, veggie curry

So here’s the list of basics that you’ll always find in our campervan kitchen. It seems extensive when it’s typed out, but we manage to fit everything in one large plastic tupperware box (which is easily transferred to and from the house) and a small fridge. Plus we have a ‘tea and biscuit cupboard’ which houses the rest.

And while you’ll rarely use everything here on a weekend break, when you’re reaching the end of your trip and only have a few fresh ingredients left to play with, a squeeze of lemon juice or a quick garlic and parsley butter can really liven up an old field mushroom.

Campervan Converts - campervan food, lemons

Campervan Converts - campervan food, garlic

Campervan Converts - campervan food, olives

Campervan Converts - campervan food, mustard

LIST OF CAMPERVAN PANTRY BASICS

DAIRY / FRIDGE

Butter

Milk

Yoghurt

Cheese (usually have cheddar, feta, sometimes haloumi and a small block of parmesan)

Mini pots of Philly (good for a quick sauce)

Eggs

Bacon

Meat (usually buy fresh as we go)

Fruit (selection)

SAUCES / CONDIMENTS 

Balsamic or red wine vinegar

Soy sauce

Sweet chilli sauce

Mayonnaise

Salt and pepper

Tomato ketchup

Sachets tomato paste

Branston pickle (of course)

Mustard  (usually have Dijon and wholegrain)

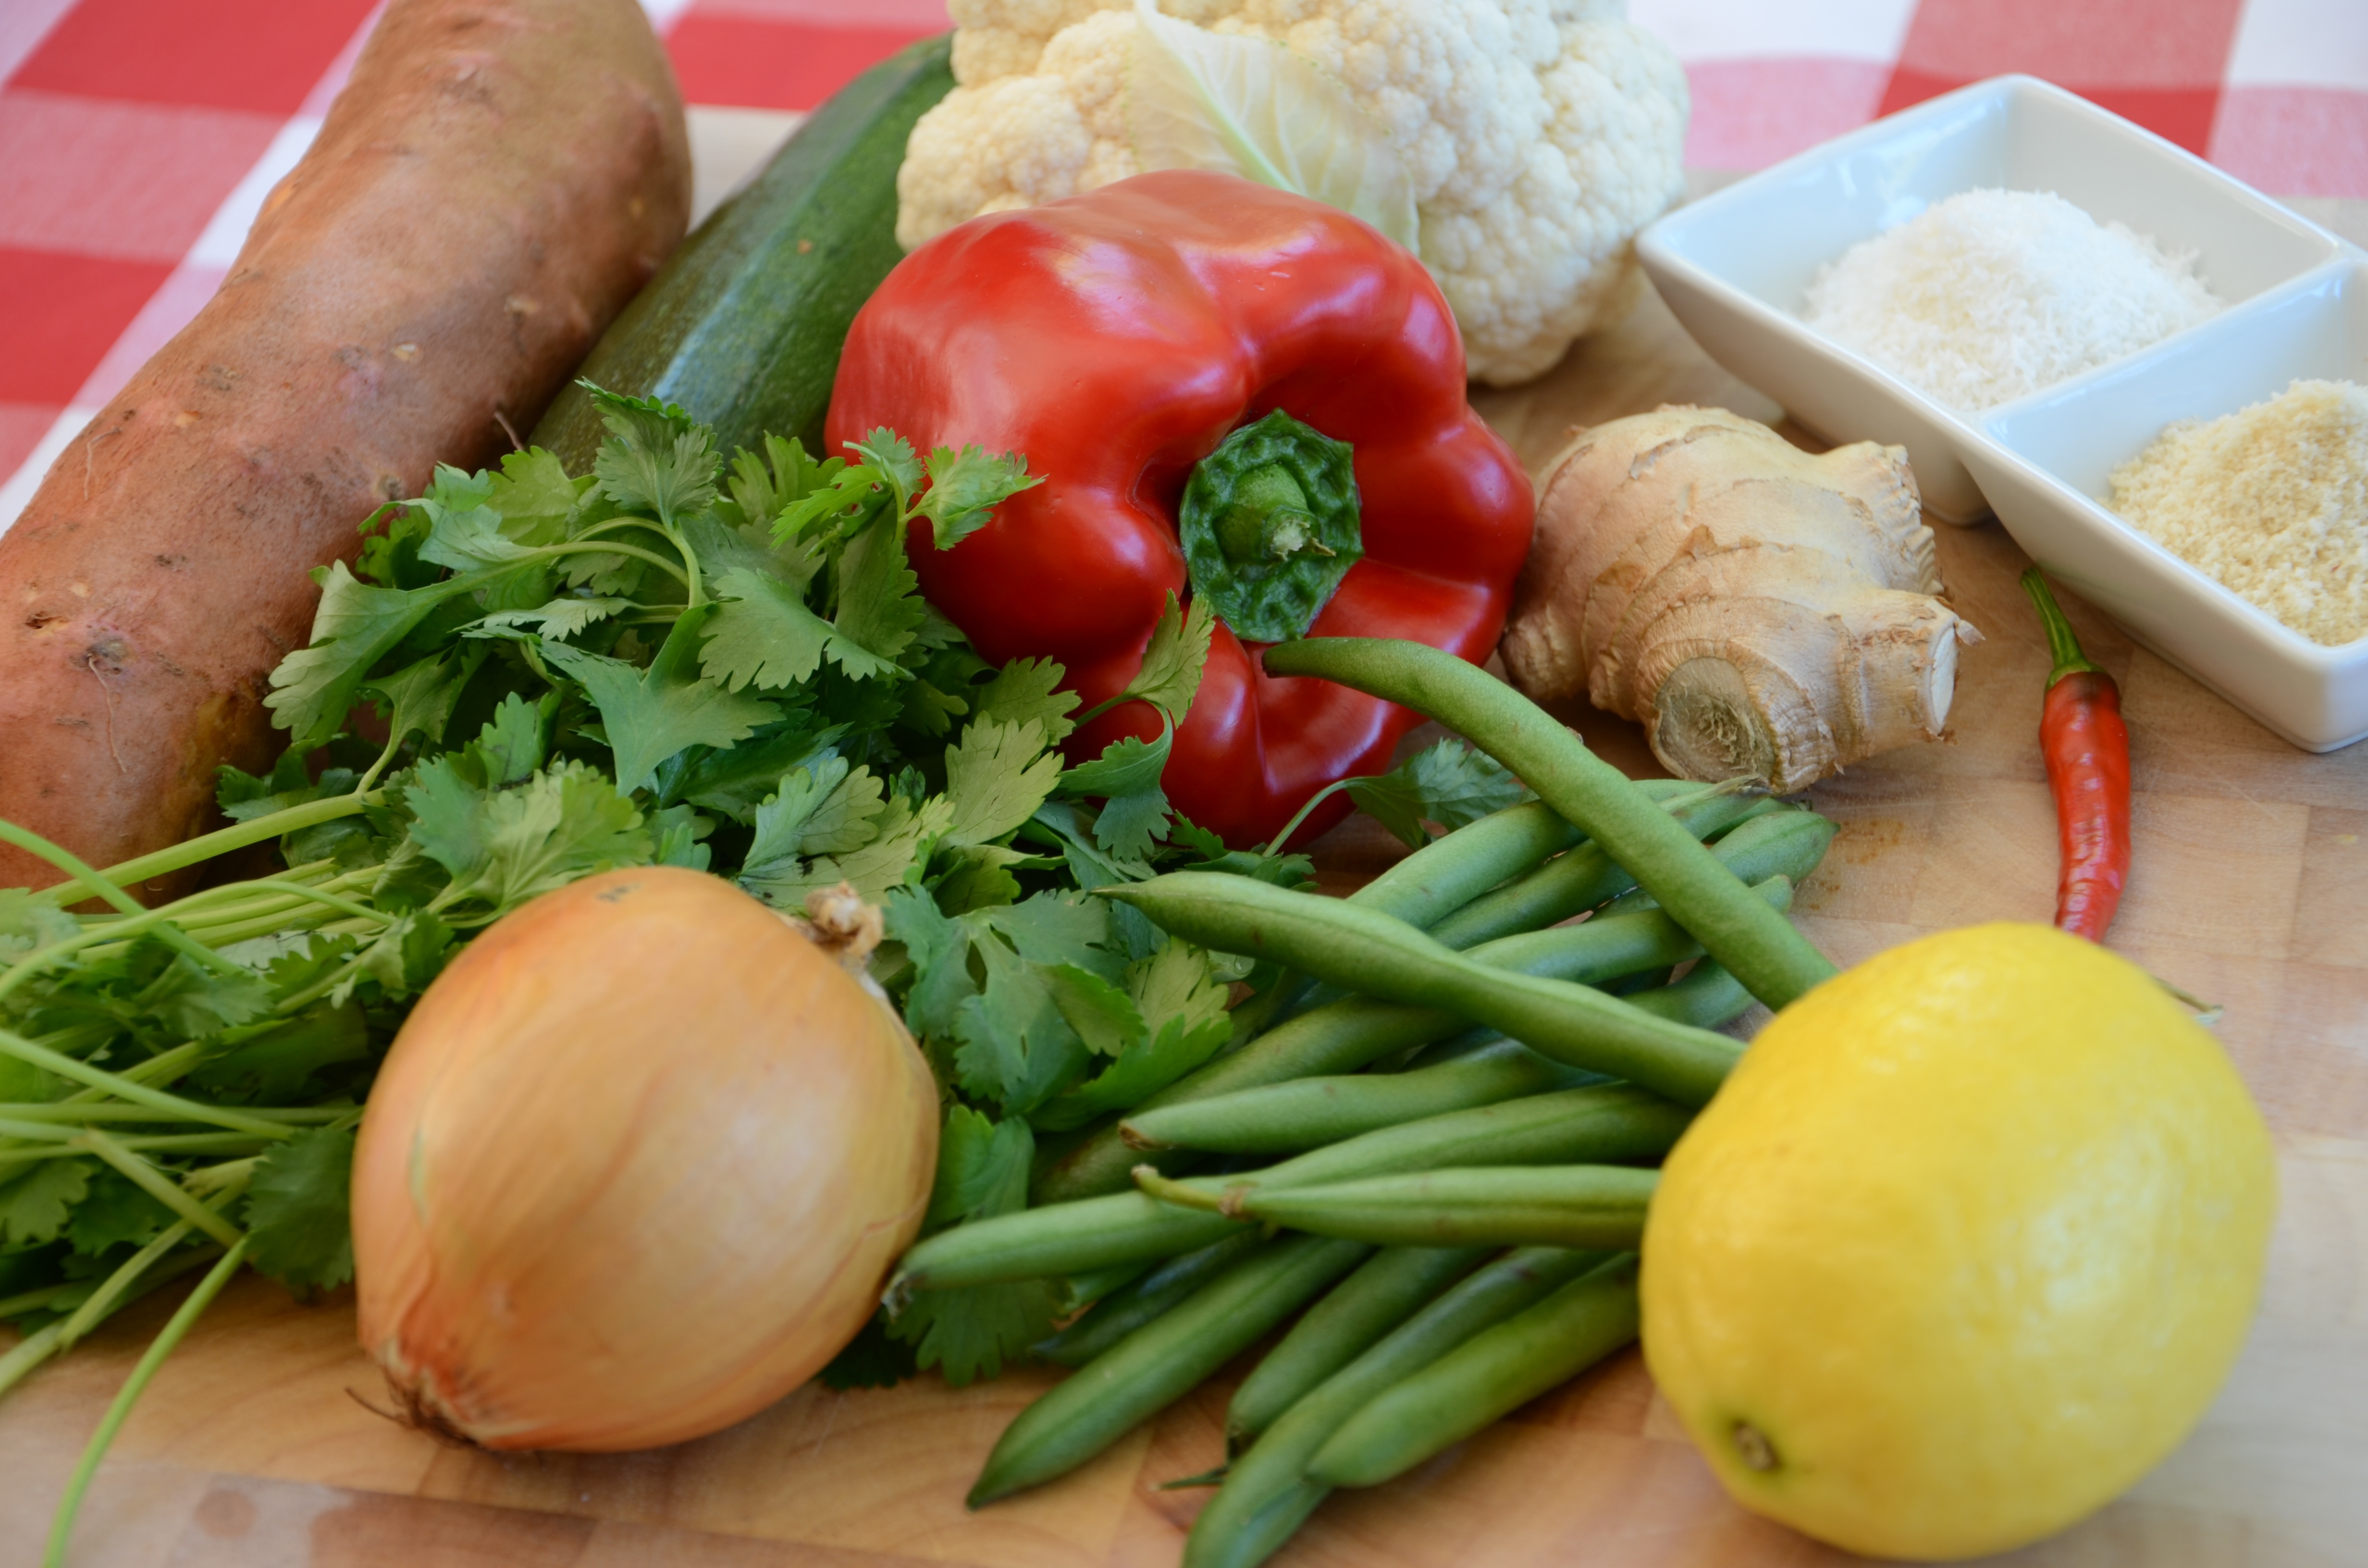
Dried herbs and spices (a selection, but the following are always there: oregano, chilli powder, ground cumin, paprika, ground coriander, sesame seeds)

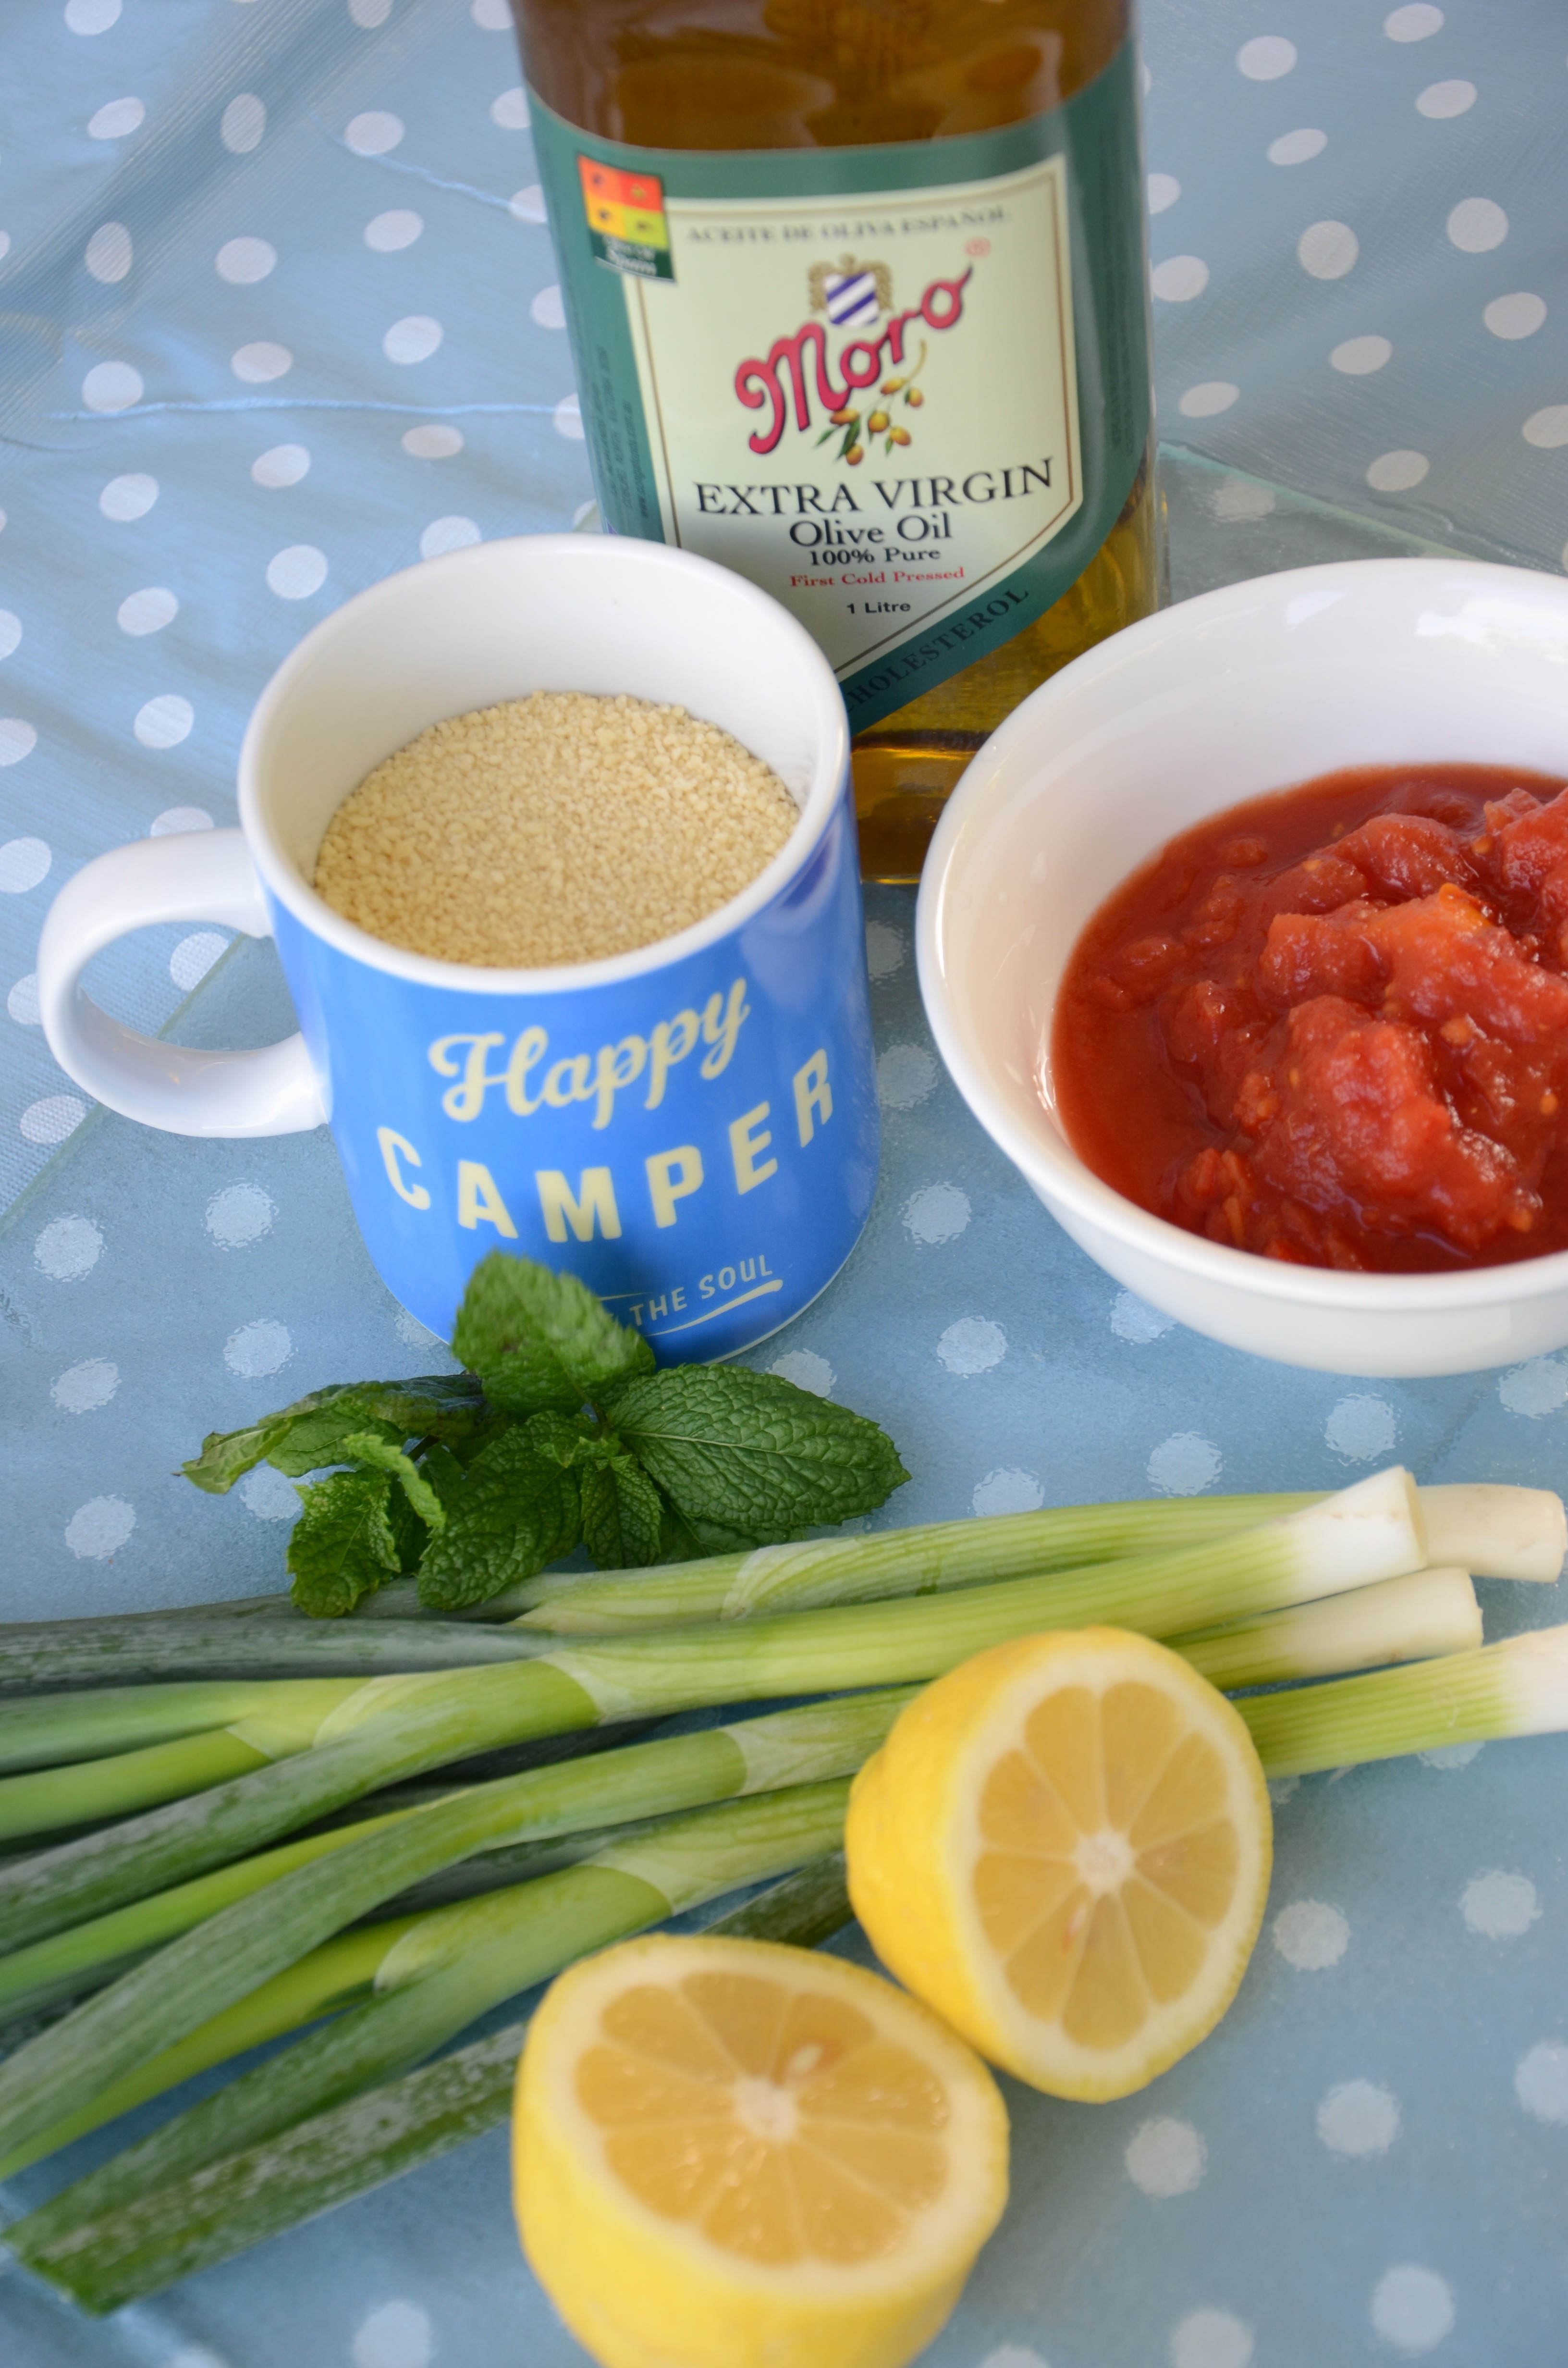
Extra virgin olive oil

Carton ready made stock and a couple of stock cubes

Honey

DRY GOODS

Breakfast cereal (small box, also porridge sachets take up little room)

Bread/rolls (we actually rarely take bread with us – it takes up too much room in the fridge and doesn’t last long in the cupboard, particularly in the summer)

Biscuits / snacks / cake

Flour (only a small amount in a tupperware / ziploc bag – useful for a quick sauce thickener)

Pine nuts

Pasta and/or spaghetti

Risoni (great for a quick camping ‘risotto’)

Rice

Noodles

Couscous (small sachets are good – am currently addicted to Ainsley Harriot’s)

TINS/JARS (mini tins where possible)

Tuna

Mixed beans / kidney beans / chickpeas

Baked beans

Beetroot

Capers

Olives

Curry paste

Coconut milk

Chopped tomatoes

Pesto

VEGGIES

Peppers

Onions and spring onions

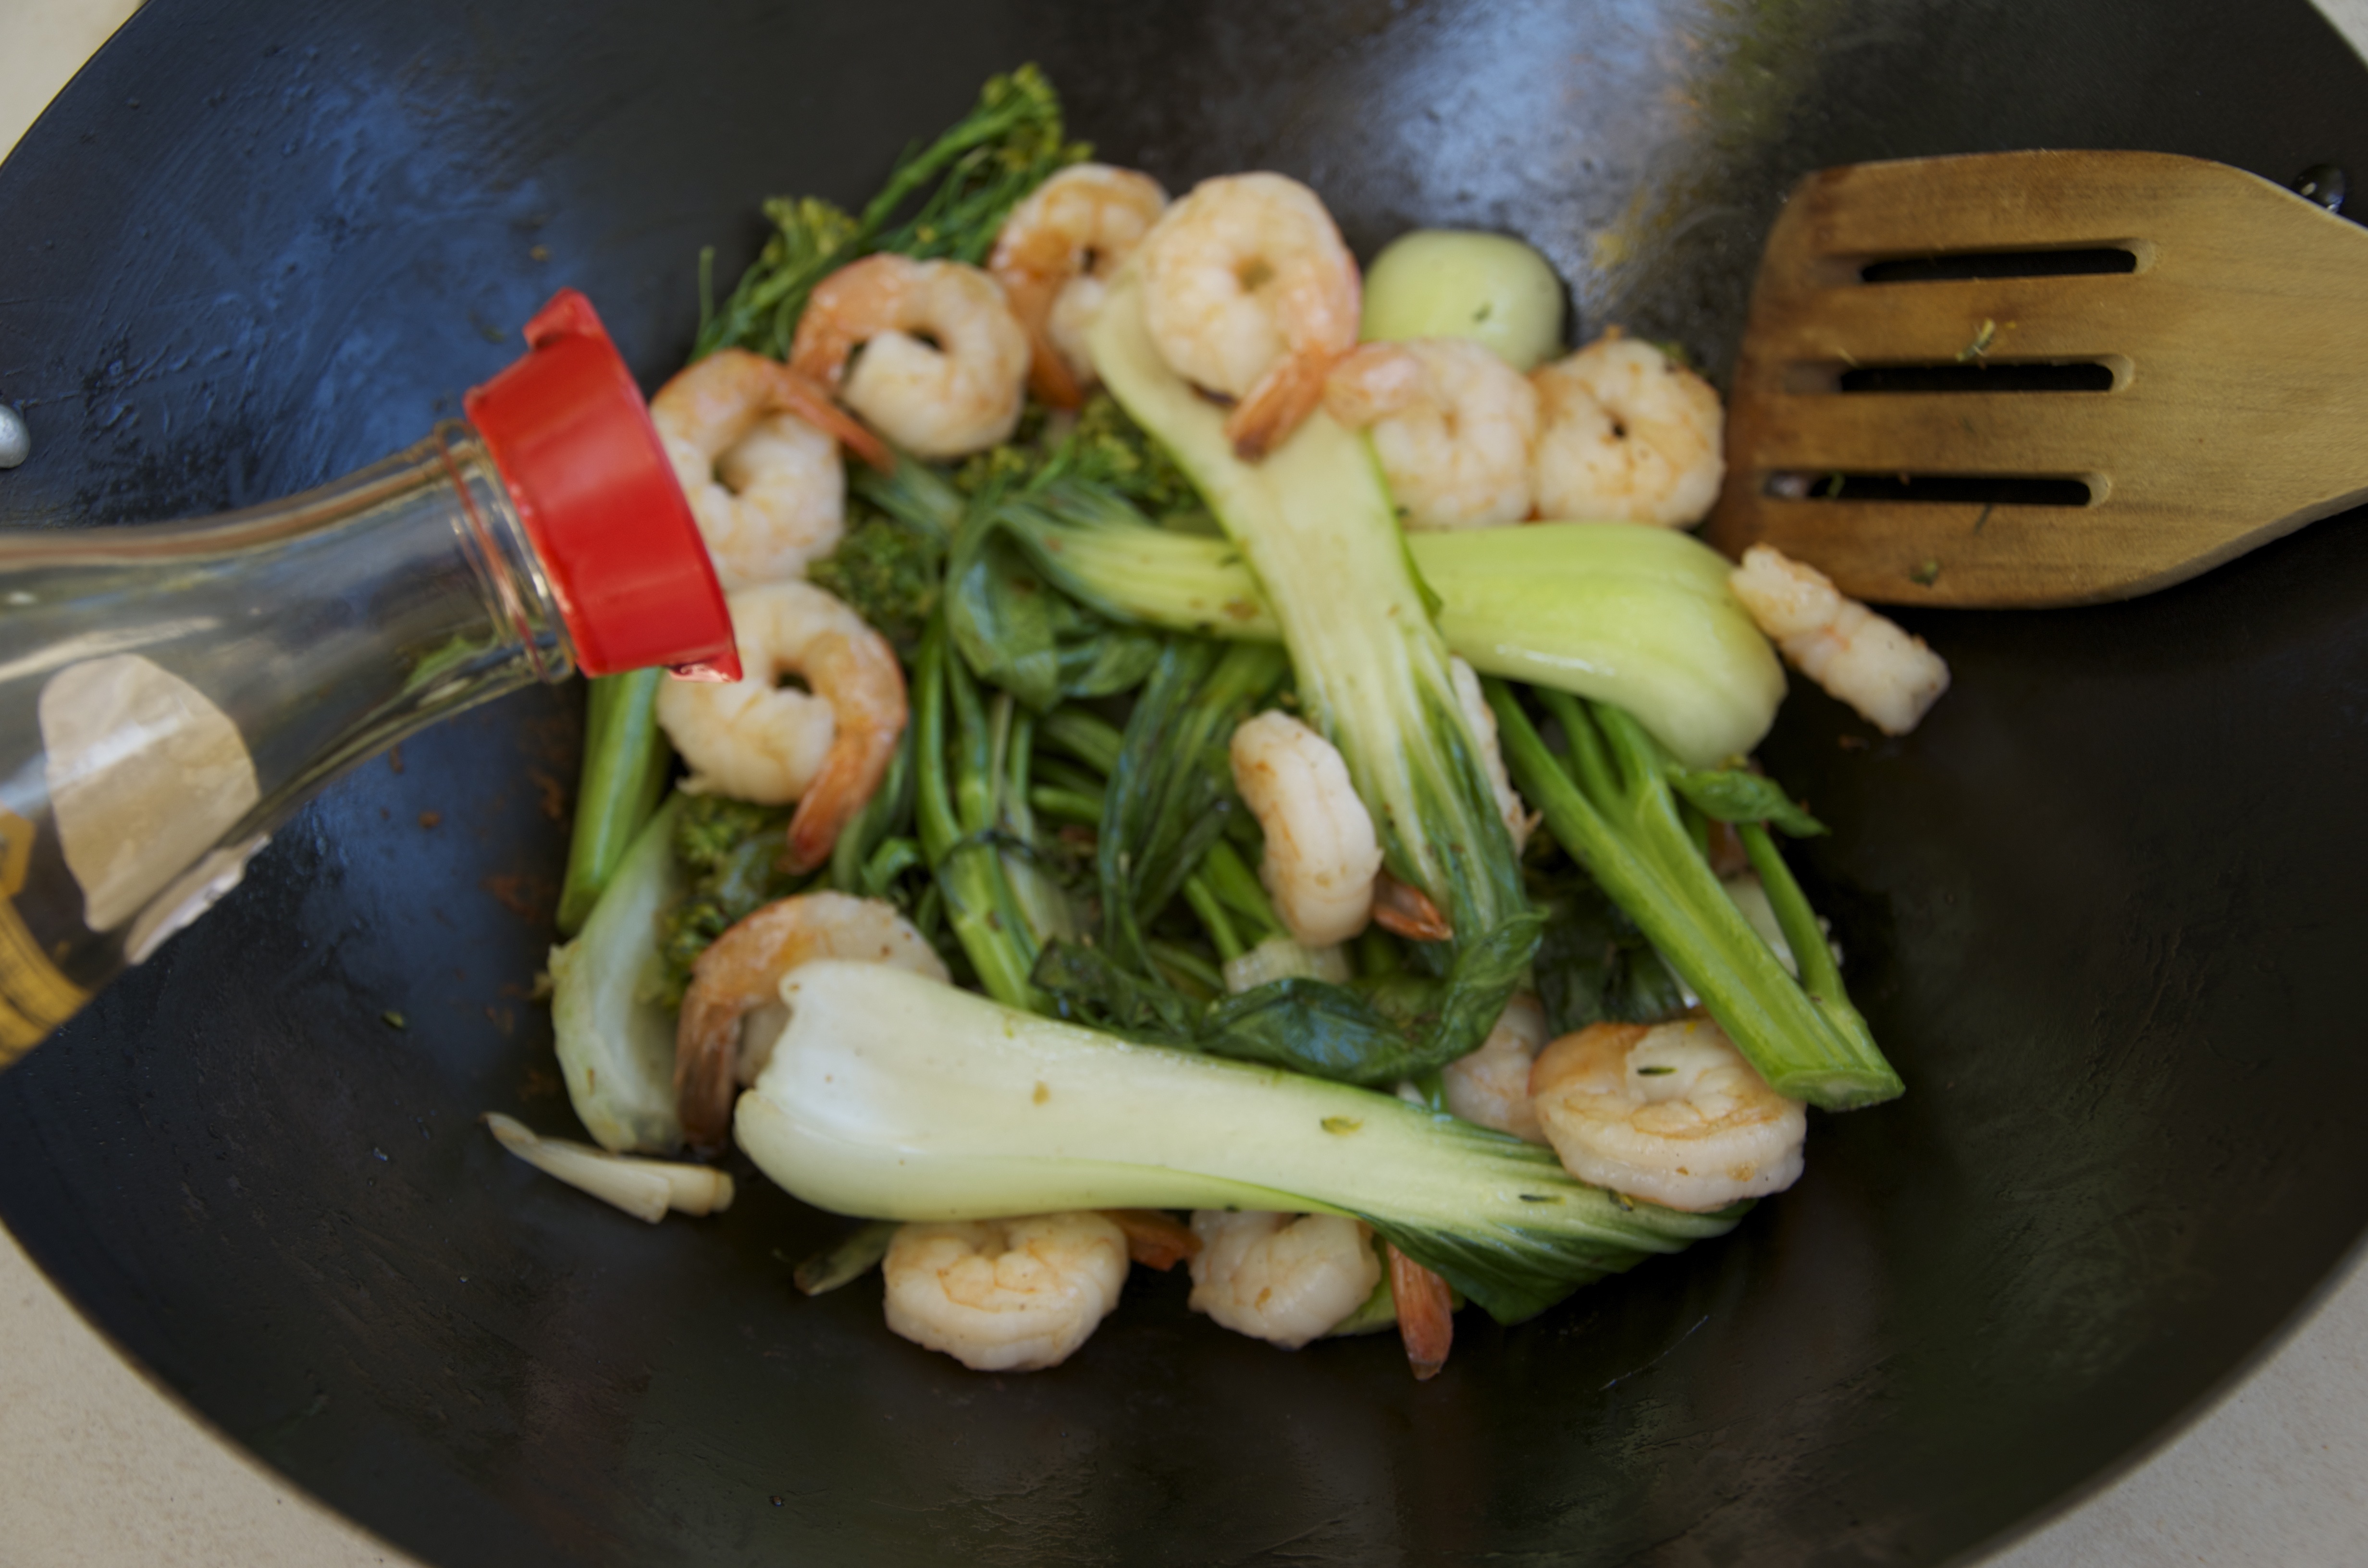
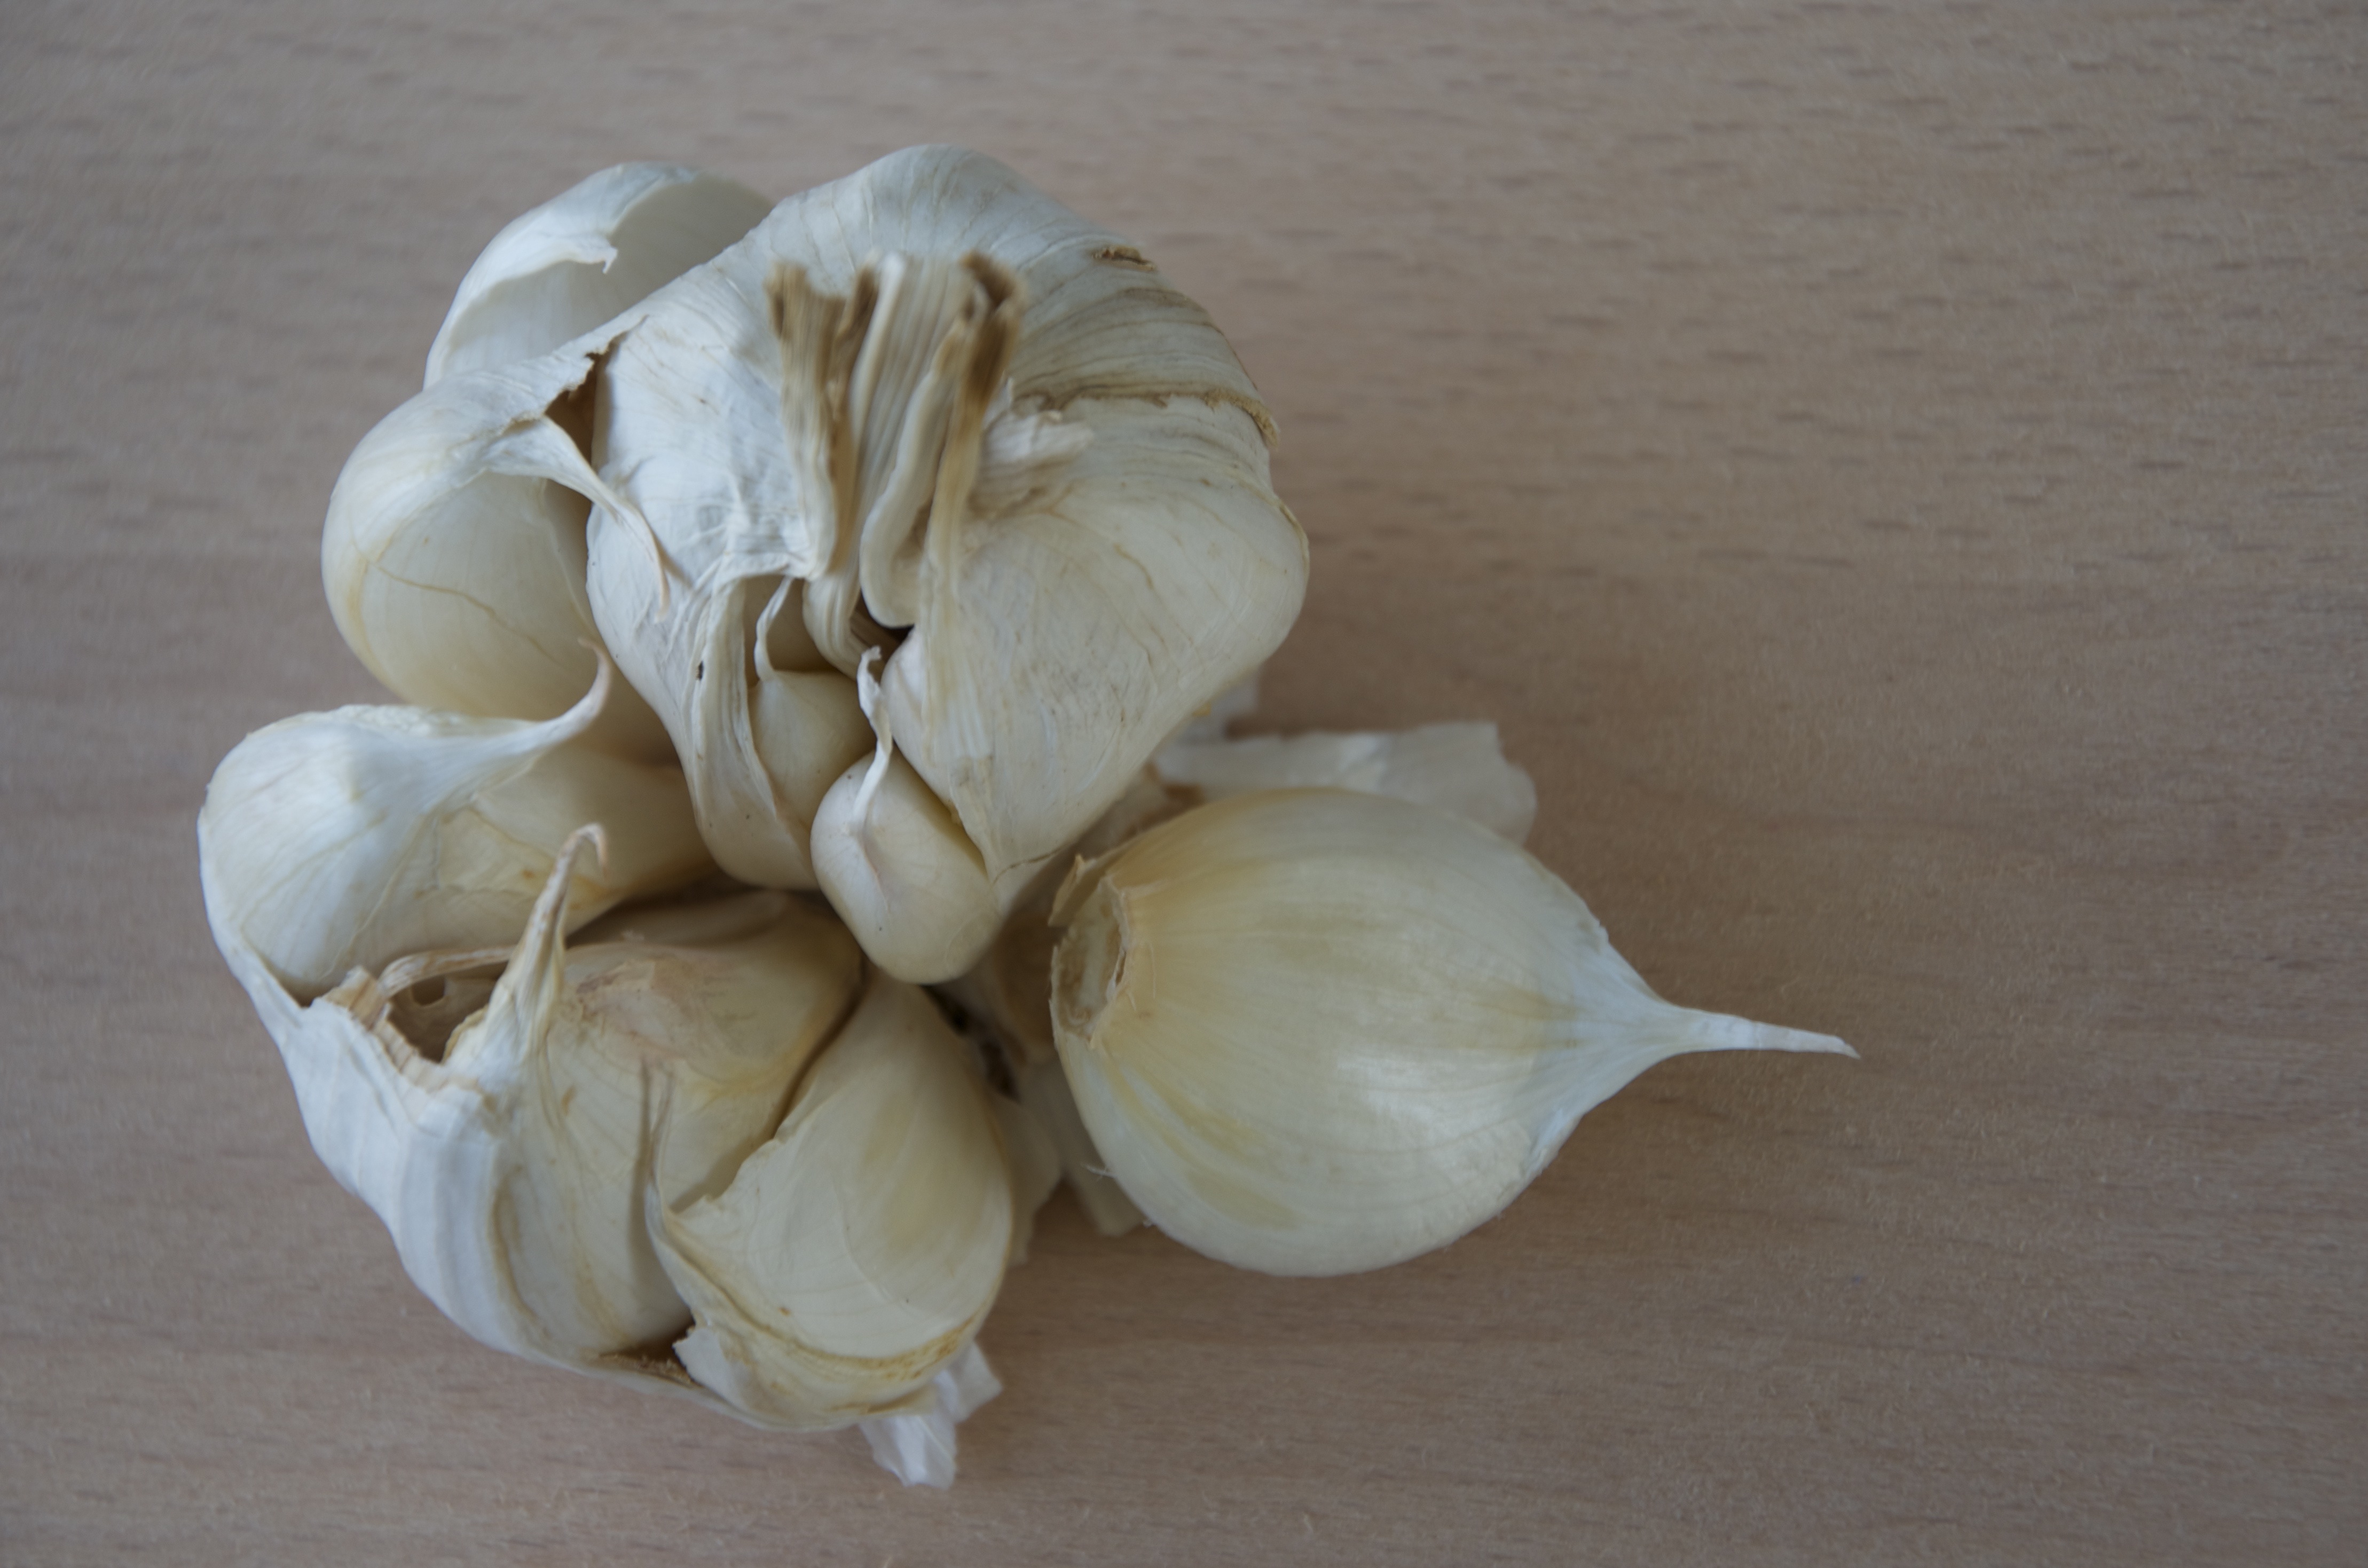
Garlic / ginger / chilli

Lemons

Tomatoes

Mushrooms

Ready washed baby spinach

Potatoes and sweet potatoes

Avocado

Broccoli / bok choy / green beans / snow peas (easy to stir fry)

Bunch fresh herbs (whatever’s in the garden – mint / basil / coriander / rosemary / parsley wrapped in a paper towel)

DRINKS

Tea (many kinds!), coffee, sugar

Bottled water

Squash / juice cartons

Wine

________

Campervan Converts - campervan food, chilli con carne

Campervan Converts - campervan food, steak

Campervan Converts - campervan food, risotto

Campervan Converts - campervan food, prawn stir-fry

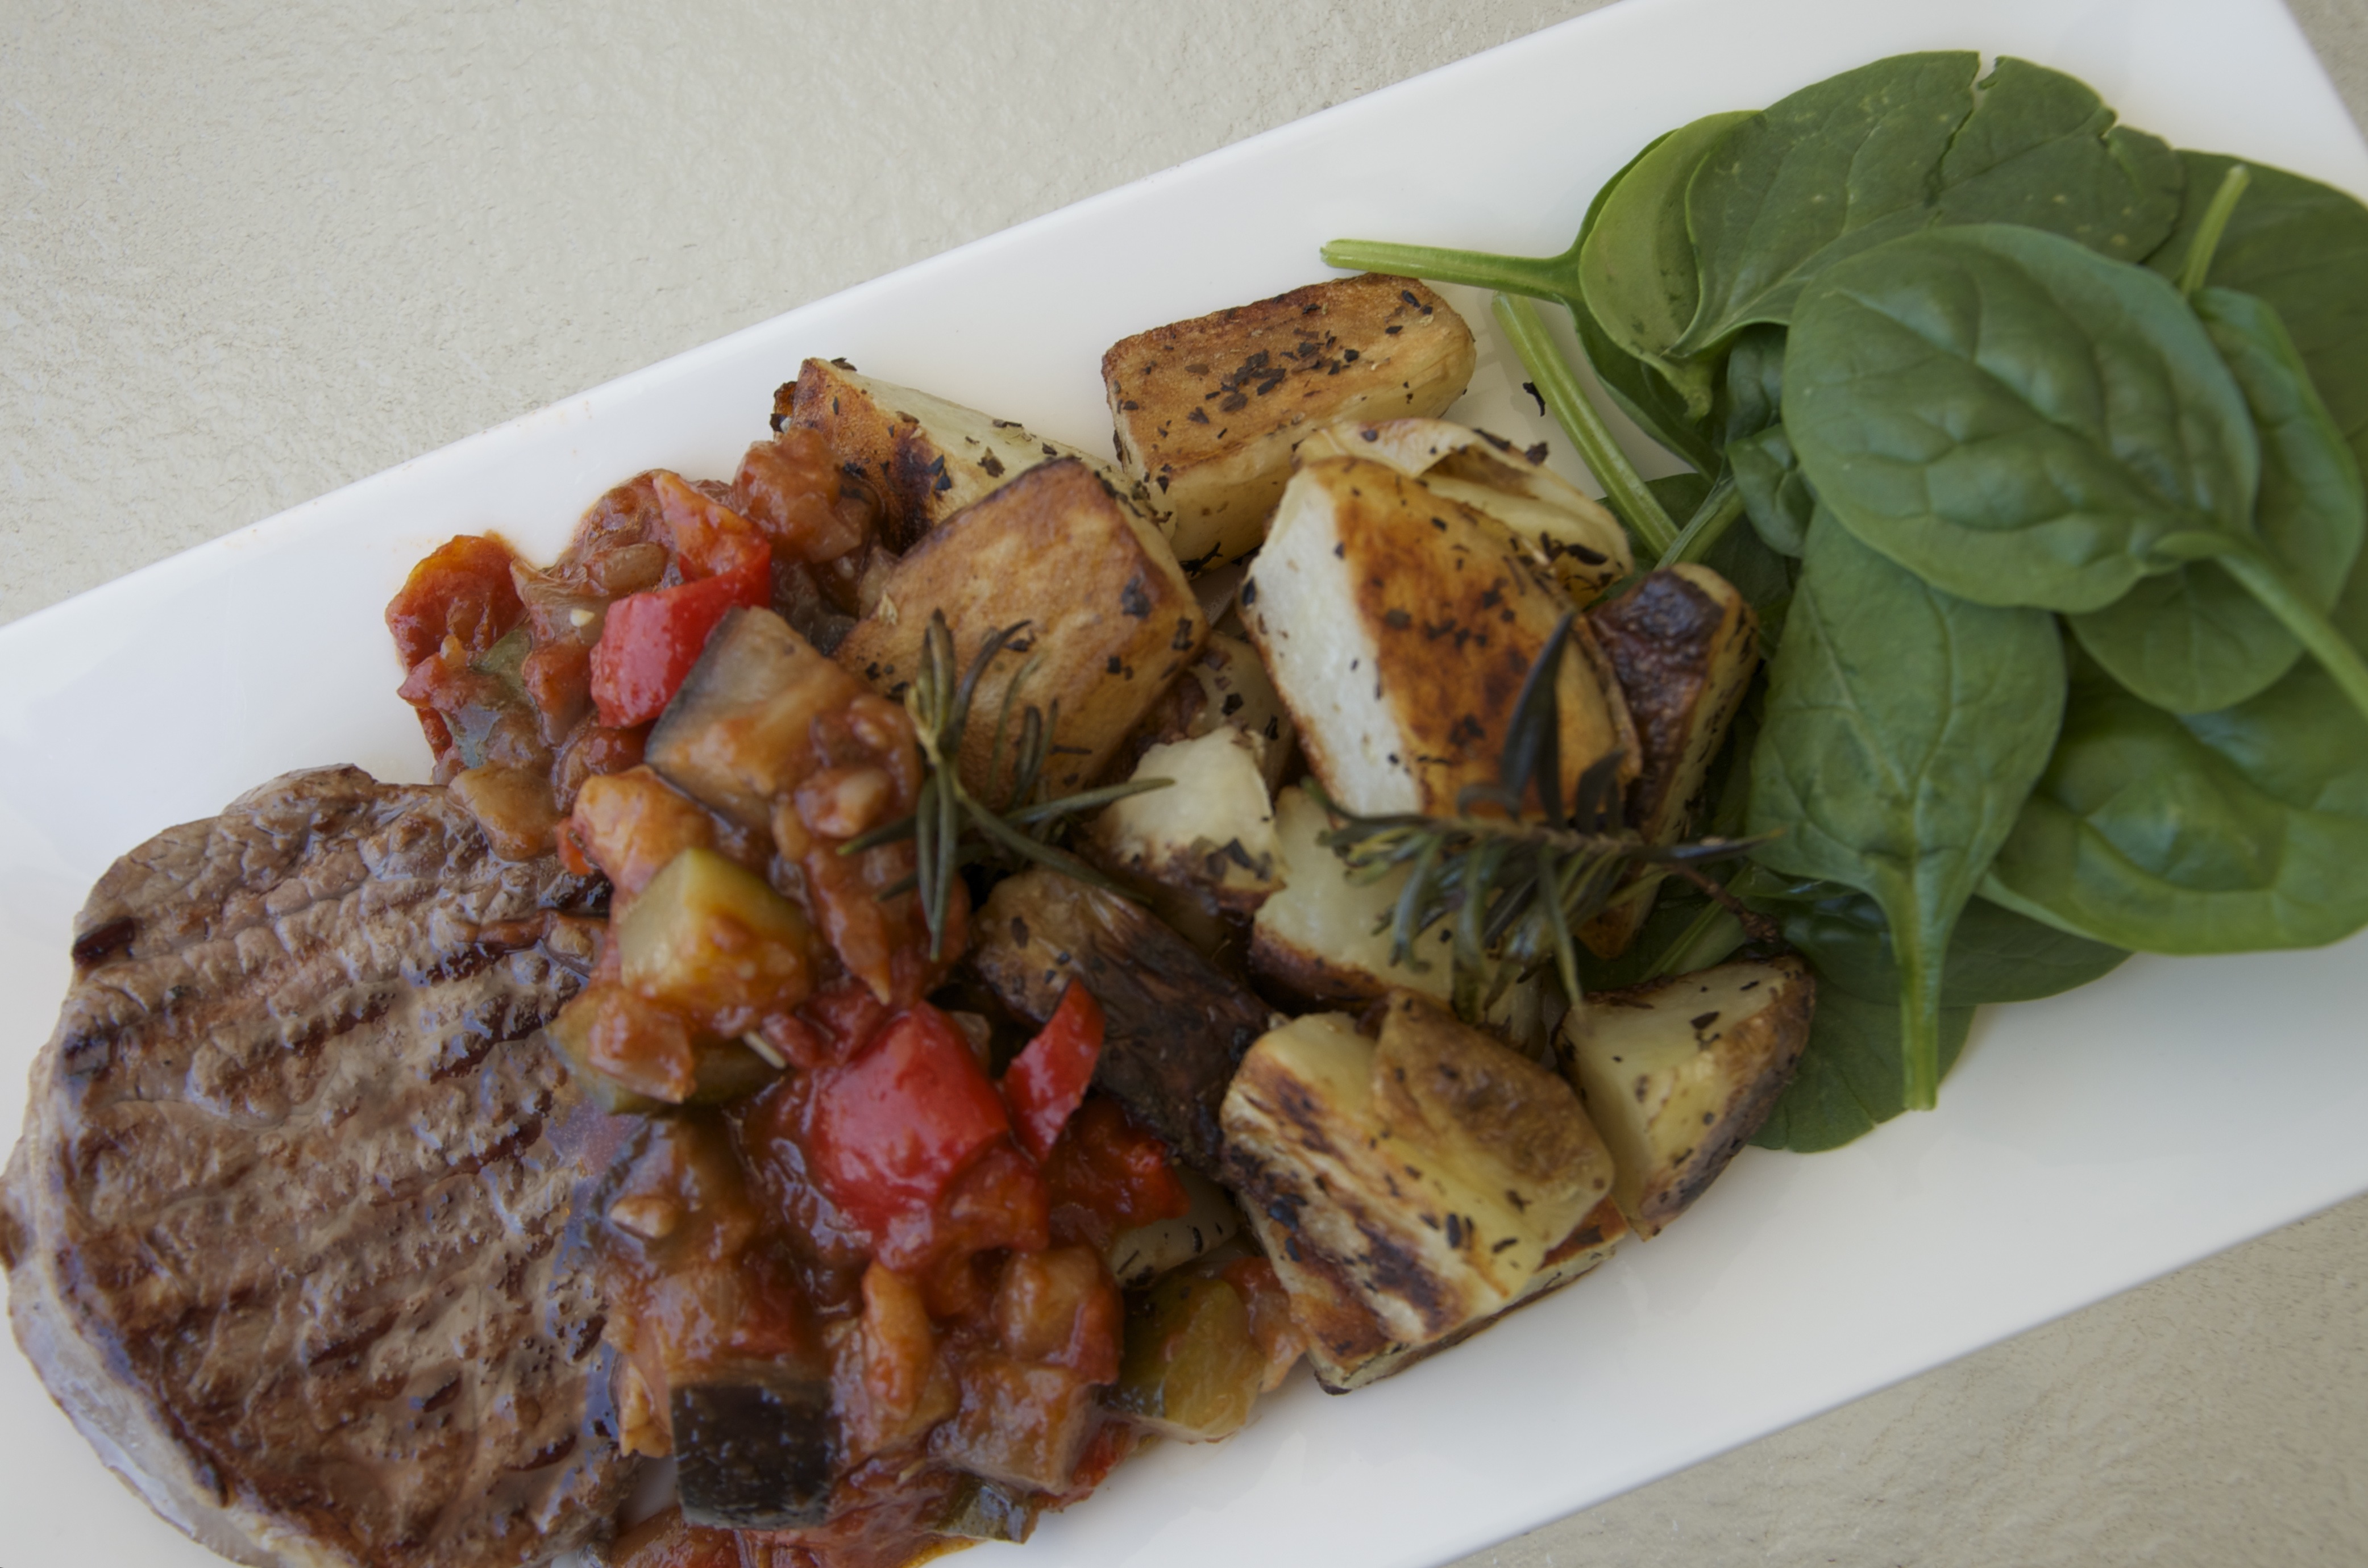
So all you need to do is fill a large tupperware box with some pantry basics like those in the list above, and there’ll be no excuse for serving sausages every evening – you’ll be creating fabulous camping meals that are the envy of all your neighbours. Recipes coming soon!

10 campervan essentials* to pack for your first trip

*may be subjective.

One of the best things about campervanning is the spontaneity. The potential to escape the city at a moment’s notice on a Friday afternoon for an impromptu mini-break, knowing that everything you need is already packed up and waiting to go. As someone who can easily spend a full day packing a suitcase preparing for every eventuality that could befall us the minute we leave suburbia, this really appeals.

So it’s worth taking the time to pack your campervan properly before your first trip, then the next time the sun appears you just have to throw some food in the fridge and you’re off.

Along with your bedding, lightweight clothes and a few good books, here are ten essentials you shouldn’t leave home without!

1. Everything in miniature

Unless you’re travelling in one of these, storage space will be at a premium so you might need to get creative with your range of kitchen utensils. The great news is that picnic crockery and camping gadgets fit the bill perfectly and are easy to find. I spent a very happy afternoon stocking our campervan kitchen, choosing plastic plates, mugs and bowls and miniature pans from Robins Kitchen – they had a fabulous selection. And if you choose brightly coloured items… they can match your cushions!

These are the pans I’m hoping will inspire me to create some hearty camping fare, although given their size, nouvelle cuisine might be a more appropriate description. We have a two-burner gas stove so a saucepan, frying pan and colander should be sufficient. I also couldn’t resist the tiny red milk pan, which is probably too small to be practical (the first time I placed in on the stove, a gust of wind whipped through the campervan and blew it off) but it might come in handy for a little hollandaise.

Nb sometimes it’s just not possible to find smaller versions of everything, for instance unfortunately I could only find bucket-sized wine glasses.

2. A whistling kettle

The quintessential camping accessory. Continuing the theme of miniature, I found this fab little kettle:

But when I got it home, it was devoid of a whistle! So we now have a proper camping kettle, which will join all the other whistling kettles in the campsite to proudly carol out cup-of-tea time.

3. All-purpose microfibre towel.

We hang this by the campervan door and it’s so useful for dusting off feet, wiping up spillages and drying chairs. Being microfibre it dries very quickly. Ours was from Kathmandu.

4. Long-handled broom

This was a last-minute purchase before our first trip but is one of our most useful items, particularly when camping near a beach. It takes no effort at all to sweep out the sand; much easier than crawling around with a dustpan and brush.

5. Pretty tea light holders

What’s an al fresco dining experience without flickering candle light? These will add a spark of colour to your outside table and provide a bit of light in the evening without attracting the mozzies. Surprisingly these came from Bunnings – one of those trips where you just go in for a few bolts…

Number 5 was originally going to be ‘portable washing line’, but the photo wasn’t very inspiring – particularly on the back of numbers 3 and 4, ‘broom’ and ‘mop’.

Nevertheless, what a washing line lacks in aesthetics it makes up for in practicality, and is really handy for drying small items. Such as zip-loc bags.

Note this is not our washing line, but that of a neighbouring campervan when we were travelling in NZ. I thought it was very admirable. (Note to self: pack more zip-loc bags.)

6. First aid kit

This is one of the essentials that is…well, more essential than previous items, particularly if you’re venturing off the beaten track. You should also know how to use everything in your kit. So far we haven’t strayed far from civilisation, and I’m hoping that relocating our daily weekend routine from house to campervan won’t be dramatic enough to suddenly necessitate an eye bath or splint, but it’s there just in case.

Given the propensity of some of Australia’s more lively creatures to inflict any potential harm, we also have a comprehensive wildlife book to identify everything that could possibly join us on our voyage. I’d recommend not even flicking through this before you set off.

7. Novelty tea towels.

This is the perfect opportunity to use all those tea towels that you really, really love but for some reason have never been displayed in your kitchen at home.

8. Evening activities

So you finished your book during your afternoon siesta, but before you start hyperventilating at the thought of spending even a night without tv/dvd/dailymailonline, there is still much fun to be had with an old-fashioned pack of cards and the ubiquitous travel Scrabble especially if you try rude scrabble. Our next trip will be very exciting because we boosted our activities box over Christmas when Paul got a mini telescope and I got… a cross stitch!

9. Citronella candle and insect repellant


It’s a fact. Scottish highlands or Queensland hinterland, mozzies love camping. Some people naturally attract them more than others, so your best defence is to travel with one of these people. That’s what Paul does. Hmmm. You can’t avoid them completely but burning a citronella candle outside your campervan and dousing yourself in Aerogard will take the edge off.

10. Unconventional cutlery
Whether you’re picnicing in a meadow or huddling under your awning, all outdoors meals can only be improved with the addition of a stripy knife and fork and gingham spoon. These came from Robin’s Kitchen. Love that shop!

So there you have it. Our ten essential items to stock in your campervan. Is there anything I’ve missed that you can’t leave home without?

Presenting… our diy campervan

Well the deadline was Christmas, and apart from a few final tweaks, our campervan is finished. YAY!

The festive corner

Fridge nicely stocked

We still need to finish some edging, paint the inside of the back door and make some tiebacks (ribbon will do for now, in keeping with the season) but this can all wait until the Christmas break.

Of course I’m biased, but I think Paul has done a stunning job – the van is unrecognisable from its days as a minibus and I can’t wait for lots of campervanning mini-breaks.

And the maiden voyage is not far off; we’ve booked one night on North Stradbroke Island at a beachside campsite called Adder Rock. We’re hoping the name is not prophetic, but just in case we’ll be requesting a pitch far from any rocks.

We’ll let you know how it goes. Merry Christmas everyone!

Preparing for a hot summer – campervan ventilation

Summer is officially here, and the temperature has soared over the last few weeks (sorry to anyone shivering in the Northern Hemisphere). All through winter I was wondering if we’d have enough cupboard space to store a 25 tog arctic duvet during the day (answer: not a chance), and suddenly it’s a question of how we’ll be able to cool the van down, particularly at night.

The front of the van has air conditioning, but it only works when the engine’s running. So as extra ventilation, we have the ceiling fan which provides a good breeze, and even when it’s not switched on, the open vent lets some fresh air in. We also have an air vent in the door next to where we’ll sleep:

To fit a vent:

  • Draw an outline of your vent panel on the inside and outside of the van.
  • On the outside of the van, cut three 10cm diameter holes through the body work with a hole saw, and seal them with a rust proofer. Note – if you’re fitting a vent to a door like we were, you’ll find it has extra bracing and reinforcements than the rest of the van – be careful to avoid these when you’re drilling.
  • Drill 6 bolt holes around your outline on the outside and rust proof each one.
  • Squeeze a line of silicon around the inside edge of the vent panel intended for the outside of the van (to prevent water seepage).
  • Attach this vent panel to the outside and bolt through.
  • On the inside of the van (ours is hard board) cut a square hole a few centimetres smaller than the outline you’ve drawn, and tighten the bolts you’ve just screwed through with nuts. Take care not to screw them too tightly, as the outside body work will start to bend inwards.
  • Fit the inside panel over the template you drew and simply screw 6 bolts into the hard board.

We have two other vents in the van: in the battery compartment and next to the fridge. The fridge didn’t strictly need one, but it’s an added safety feature in case it ever overheats. These two vents were much more straightforward to fit; they’re not visible from the inside so the open hole can be exposed, meaning you only need to bolt a vent cover to the outside. Here’s the battery vent from the inside:

We also have an extractor fan above the gas stove:

Paul boxed in the top using the same gloss wood he’s used all the way through.

So that’s the campervan’s ventilation, but hopefully for most of the time we’ll be sitting outside under our lovely new awning!

For some reason awnings are incredibly expensive. This one is a Fiamma ‘bag awning’ from Caravans Plus and a really basic version, but it was still one of our most expensive campervan purchases. You have to roll it down manually, but it seems to work okay.

The frame is fixed to the van and you roll the awning in and out of its bag. You can then remove the cover and store the whole thing inside when you’re not using it.

So there’s not much left to do now: refit the ceiling, build a bathroom door, fit the door handles and then we’re almost there! Oh, and make 11 curtains.

Plumbed in and ready to go

After the overindulgence last week of filling both sinks to the brim to test the campervan’s plumbing system, came the inevitable morning-after headache when we tried to empty them. The main problem has been finding fittings to connect the various flexible pipes to their respective tanks. But, with a bit of wrestling and a lot of silicon, everything seems to be secure and the cabinets have stayed dry! The only unexpected outcome is when we empty out the bathroom sink, the kitchen sink fills up:

Apparently it’s because our driveway slopes downwards, although I may keep it up my sleeve as a last-ditch party trick if we ever end up at a particularly sociable campsite.

This is the waste water tank, secured into place with some luggage straps.

The main grey hose leads into the tank from the two sinks, and we can empty it out via the blue tap at the bottom, which leads to an outlet with a normal hose connection:

We fill the cold fresh water tank up from the inlet pipe:

The pipe was a bit too wide to fit through the standard inlet connection, so Paul heated the end in boiling water until it was soft and pliable enough to fit. When the pipe cooled, it expanded back to its previous size and filled the hole nicely.

From there, it runs around the back of the waste water tank and into the fresh water tank:

The vertical pipe is a ventilation hose, which exits just to the left of the inlet hole (see above), and the metal bracket at the front holds the tank in place.

The real test for the whole plumbing system will come when we’re bumping along one of Queensland’s finest outback roads with a full water tank; it may be prudent to fill our limited storage space with more emergency mops than emergency cardigans for our first few trips.

Who knew making a wooden seat could be so complicated?

Well ours has been very complicated, but having spent the last couple of weekends playing with hinges and bolts and sliding locks, Paul has now fixed and secured all the campervan seating. Let’s hope we’ve finally seen the last of the comedy seesaw moments.

The seats needed a bit of adjusting from their original position to allow for a 28mm overhang all around to protect the cupboard doors underneath. Once the seating panels were all screwed down, Paul turned his attention to the backrests.

Because the engine is underneath the driver/passenger seats, we had to hinge the backrest behind the cab to allow the front seats to still lift up and provide access to the engine.

And because the backrest doesn’t lean up against anything, Paul also fixed a small arm hinge at the side and a sliding lock at the back to strengthen it when it’s in the upright position.

The other backrest also had to have a sliding lock behind it to stop it falling forward. It’s this backrest which pulls over to form the bed support, and it’s really quite heavy to lift. To make this job a bit easier, I did attempt to fashion a handle out of a few scraps of gingham I had lying around (as you do). Unfortunately though, while clearly very beautiful, my handle was not up to the job and suffered major structural failure on its first outing. We might just buy a metal one from Bunnings.

The final stage in the seating was to make a trap door (with fully functioning custom-made handle) above the battery compartment to give easy access to all the electrics.

Here’s the bedding configuration:

The kitchen work surfaces are also now secure, having been screwed down to the cabinet shell underneath with small right angle brackets. Paul fitted a gloss white side panel onto the cabinet containing the fridge, and added a water indicator, which will link to the fresh and wastewater tanks.

Then on the outside of the van behind the fridge cabinet he fitted an air vent:

We also saw the first splash of red above the fridge:

So the seating is completely finished. Stay tuned for phase one of the plumbing!

Creating a campervan kitchen

I’ve had a polite request for more campervan photos, so here’s a pictorial update on the kitchen (with as few words as I can muster!)

So our exciting delivery from Caravans Plus last week revealed a ceiling fan, a gas stove and a kitchen sink:

Caravans Plus has been a very useful supplier, we also bought the Thetford toilet and gas bottle casing there. And although they’re based in NSW, the delivery charge for everything in this picture was only about $30.

In preparation for installing the stove and sink, Paul came home every evening last week and lovingly sanded and oiled the wooden worksurface. Then he sanded it again with a finer sandpaper, oiled it again, sanded it again and gave it a final coat of oil for good measure. And then he cut a huge great hole in the middle to fit the gas stove. Still, the rim of the worksurface looks lovely and smooth:

The lid also comes down to create an extra worksurface:


It was obviously a cloudy day in Brisbane.

Paul also prepared the worksurface on the other side of the kitchen where the sink will sit. 

Neither the stove or sink are connected up to anything yet. 

The hardest bit with the worksurface was cutting around the handle next to the door – on the right hand side of the photo above. Paul used a cardboard template to cut around the edge, and the patent-pending right-angled pencil made another appearance.

So here’s an overall view of the kitchen, I think it’s looking beautiful!

Paul has already started work on the seating / bed configuration, so that will be the next chapter in the story. Just don’t mention the seat cushions. I was distressed to discover I have inherited no sewing genes whatsoever, and combined with an innate lack of patience and defiant new sewing machine, progress has been fairly slow.

The quickest route to a relaxing weekend?

Straight down the Pacific Highway, of course. After a busy few weeks at work, Paul and I had been craving a quiet, relaxing time over the five-day Easter break. So I think we were both a little surprised to find ourselves not heading to the coast, but ensconced in a crowd of other frazzled couples being herded along the pathway at Ikea. A pathway from which there is no escape. No early exit strategy. Everywhere you look people are frantically searching for a little pink card that says ‘Move directly to marketplace. Do not pass go. Do not collect £200.’

Anyway, the plan was to look for a wooden work surface for the campervan kitchen. This was an about turn really; we’d always been keen to avoid the traditional pine look that you see in so many pictures of converted campervans, and were planning to use a pale laminate for the kitchen surfaces instead. But Paul loves working with wood, and was concerned that the interior was starting to look too white and sterile. I am inclined to think once we introduce the red cupboard doors and stripy seat cushions it’ll be hard to see any white, but I do quite like the idea of a solid wooden surface. Like one huge chopping board. So we’re hitching a brief ride on the pine-look bandwagon and have bought an Ikea Lagan worktop. It was almost 2.5 metres long, weighed over 30kg, and only just squeezed in the car (barely leaving room for my Ikea purchase: a single fluorescent dishwashing brush, which was looking a bit forlorn at the bottom of my huge yellow bag).

Paul’s cut two pieces of wood to fit each side of the kitchen and has given it about five coats of timber oil. He chose a Danish wood oil in the hope it would get along nicely with its Swedish wooden companion.

Wood before being oiled

In other news, Paul’s been doing some finishing touches on the cupboards and has boxed in the wheel arch at the back of the main kitchen cabinet, using the same laminated wood he used for the walls.

He’s also completely secured the toilet to the floor, which I am relieved about because I find it quite a comfy place to perch while Paul’s working, and as our driveway is on a slope, I was always in slight danger of sailing off down the van. Fixing the toilet was quite tricky, we couldn’t get long enough screws to drill far enough into the floor, and the limited space in the base of the toilet made it awkward to get the drill in to screw down. So Paul went underneath the van and used long bolts to drill up through the base of the van and through the floor, and secured the bolts with nuts in the base of the toilet.

Finally, the prize for this week’s most interesting photo surely goes to:

This is the steel box that Paul has resized for the gas bottle, so it will snugly fit our 2kg gas bottle rather than the 9kg one it was intended for. A bit of hacking and a lot of sticking has saved us sending the original box all the way back to NSW.

Earlier this week we had a bumper delivery from Caravans Plus which included a stove, kitchen sink and roof fan, so Paul’s going to tackle some of those this weekend.

Plan of attack – 11 simple steps to achieving your diy campervan

Right. These are the 11 simple steps needed to transform our maxi-taxi into a campervan so our 4-wheel adventures can take off in relative comfort. And style, obviously.

    1. Buy and fit laminate flooring. Involves removing upright bolts in floor that were used to secure the seats (and which I keep treading on), fitting chipboard, laying the underfloor insulation and then fitting the laminate on top. Having spent only 20 minutes in sauna-like conditions measuring up the van yesterday, we’re going to skip the underfloor heating at this stage.
    2. Order and fit toilet. The size of the toilet will dictate where the three surrounding ‘modesty’ screens will sit, and how much space we’ll then have for the kitchen. [note: The bathroom will also be accessible from the rear door of the van, which means we can empty the waste water from the sink and remove the cassette from the toilet. This also means we can get a bit of a through draft into the van when the door’s open. There will be a screen next to the toilet so it’s not visible through the back door, but fitting a wall next to the basin would reduce the bathroom width by about 10cm so we’ll just have a blind on the glass instead. One that’s dust-repellent, anti-static and easy to wash, of course. If such a thing exists?? (sorry, in-jokes are probably considered very poor blogging etiquette).]
    3. Order and fit fridge, freshwater tank (which will go under the kitchen sink) and waste tank (which will sit under the bathroom sink – we can then open the back door of the van and empty water from the valve at the back of the wastewater tank, just as we can remove the cassette from the toilet on the opposite side of the bathroom). Also order and fit smaller (2.5kg) gas bottle and casing, which will sit underneath the seating next to the stove.  Fitting the big ticket items early on lets us see how much space we have for everything else.
    4. Joinery – build cupboards / drawers which will go underneath the seating and underneath the stove and sink in the kitchen. And the sink in the bathroom. Also need to fit extra panel to the side of the seating which will slide out to form the bed, fit laminate onto wall between kitchen and bathroom, and incorporate the door.
    5. Order and fit water heater and water pump. Ideally these would go on the left-hand side of the van underneath the sink but that side is already heavy with both water tanks, so to distribute the weight a bit, we’ll put the water heater on the right-hand side under the stove, and run a pipe underneath the flooring to the freshwater tank.
    6. Finish bathroom – install basin, do tiling around toilet and basin.
    7. Figure out wiring and locate batteries – not sure if we’ll need one or two at this stage – but they’ll sit alongside the battery charger underneath the seating behind the driver’s seat.
    8. Electrics – fit and connect lighting, connect water heater, move speakers (currently providing piped music to the bathroom) to the middle of the van and install 3 ceiling vents.
    9. Fit work surfaces in kitchen, install sink and stove and connect to gas (will need help with this bit).
    10. Upholstery – fit seating in living area.
    11. Interior design – fit blinds and/or gingham curtains, commission surfer-chic artwork, casually scatter cushions around seating.


We’ve chosen the hottest day of the year so far to start on the flooring…

Paul resorting to desperate measures to find some shade


The hardboard layer and insulation went down well, and we’re ready to lay the laminate flooring next weekend. Again, let’s make it clear when I say ‘we’ – Paul is doing all the physical stuff here. I have joined in the shopping excursions, but otherwise have been taking photos from the sidelines and occasionally offering helpful advice at critical moments. Which is also an important role; we should all play to our strengths.