Campervan kitchen – in go the cabinets

We’ve had to bring in reinforcements; Paul’s parents, Jean & John, were staying last week and earned their keep by knocking a few cabinets together. J & J are also keen campervanners and have just embarked on their second tour of NZ in a v posh 4-berth campervan.

So the task last weekend was to build and fit the kitchen cabinets that will house the sink, gas stove and fridge. The ‘build’ part was made easier by buying ready-built cabinets from Bunnings! Well, they were flat-packed but still easier than just buying a load of wood. Amazingly they fit perfectly width-ways, so Paul just had to take some of the height off the bottom, and cut round all the wheel arches etc at the back.

So from left to right is the bathroom basin, then there’ll be a wall, then the kitchen sink, then the fridge.

The cabinet on the other side is for the gas stove and grill.

The fridge is a Waeco CoolMatic (80 litres), which is bigger than we thought we could fit in, and has a little ice box at the top for our frozen peas. It’ll be wired in with 6mm cables to the 12volt battery and should last about 3 days before the battery needs to be recharged. That should be plenty long enough, as I can’t imagine we’ll ever go that long without plugging into power somewhere – not intentionally anyway, and if the worst comes to the worst, we’ll just have to have a couple of meals of warm beer and defrosted peas.

The next job is to source and fit the two water tanks underneath the bathroom and kitchen sinks. Paul thinks he might be able to get them from a 4WD shop this week. He also wants to figure out the seating / bed combo; this has already prompted many colourful conversations between him and his Dad, as they both have very different ideas about how to build it. I think Paul is going to take advantage of J & J being in NZ for the next few weeks to make a start on it.

Thetford cassette toilet C200, swivel, flush tank, rear entry

This is the (slightly disconcerting) description of our campervan toilet.  I have been assured, though, that the rear is actually the best place for an entry point, and just refers to how you access the waste tank. Phew. And the swivel aspect means we can position the toilet with the rear facing towards the back door (for optimum cassette removal), but swivel the seat round so we don’t have to sit facing the wall.

As the photos below probably do a better job of explaining.

The toilet is freestanding at the moment, but will be secured to the wall that separates the bathroom from the kitchen.

And we have got the crème de la crème of campervan basins! It is twice the size of the basins in our house, and plenty big enough to have a personal wash twice a day. (Sorry, these Gavin & Stacey references just keep rolling off my tongue – anyone would think I was obsessed.)

Paul bought the bathroom cabinet and basin from Bunnings, and just had to saw 10cm off the bottom of the cupboard, and cut around the wheel arch and a couple of other protruding objects. I say ‘just’ – this was in 35 degree heat yesterday. The cabinet still needs to be bolted onto the floor, but we need to fit the waste-water tank underneath the basin first.

The next job is to fit the dividing walls, so we can start fixing things into place. Having tried out almost every conceivable colour for the walls, I think they’re going to be white.

Operation flooring – how to fit a laminate floor in a tiny campervan

The only colour and material we had definitely decided on last week was for the flooring – after eliminating about 16 pale wood-effect laminates from our kitchen shop samples, we finally chose a really good one. Of course, we then went to Bunnings to buy it and they only had a choice of 3, all of which seemed quite different. Anyway, the palest was on special offer (it was also the thinnest – anything to increase our head height!) so we bought 60 kg of it and Paul made a start yesterday morning. Overall it was fairly straightforward. There’s a layer of insulation on the bottom, then hardboard, then another layer of insulation (all to reduce the noise) and the laminate goes on top, the planks locking together. The difficult bits were cutting around the wheel arches and the gear box at the front, which resulted in a completely blunt jigsaw blade at the end of the day, but it looks great now it’s finished.

Also, this is Paul’s ingenious new tool to draw the curved shape on the wood. Are you reading this, Dragons? Theo – surely a winner in the retail market?

Decisions, decisions – a guide to campervan interior design

I am starting to have concerns about my project manager’s taste in interior design. We’d always planned to keep the colours inside the campervan quite calm and neutral – white tops, chocolate seating and splashes of coffee or beige if we were feeling adventurous. But Paul has recently expressed an interest in a fairly alarming combination of sunbeam yellow and peacock blue. Clearly the campervan’s not large enough to accommodate nicely spaced feature walls, so I fear this could be a little overbearing. Maybe a bit too cheerful. I have to say though, choosing exact colours is quite a tricky business. The ceiling and very tops of the interior sides are covered in an attractive grey carpet, which has to stay, but we still need to choose colours for the bathroom wall, cabinets, work surfaces and floors.

Last weekend, we spent a morning trawling round a few kitchen showrooms to get an idea of different materials and colours. I LOVE kitchen showrooms and before I knew it, I heard myself explaining to the sales lady (or ‘hostess’ as she was called) that we were renovating our kitchen and how much are these lovely white stone cabinets with self-closing drawers and glass mosaic tiles? That was all very nice, but it made it a bit awkward to then try and steer round to the racks of cheap laminate samples to get a more realistic idea for the campervan. Sadly our budget and weight limit in the van preclude anything with granite or stone in the name, but at least there’s a massive choice available. We finally left two hours later with a handbag full of samples and a $20,000 quote for our own kitchen (maybe next year).

Back home, we narrowed it down to these, and spent the afternoon lining them up inside the van:

So it’s a fairly neutral and calming colour palette (like we’d planned), but maybe just a little… dull. We both like the idea of including something a bit bolder and brighter, something that will make you smile when you open the door. After all, that’s the whole idea of taking off in a campervan. So Paul’s started experimenting with different colours using Google’s SketchUp (a great program where we’ve got a 3-D model of the campervan), and it does seem to suit something more exuberant. Perhaps not quite as exuberant as peacocks and sunbeams, but some glossy red or (the ubiquitous) aqua could make an appearance. So the jury’s still out on that one for the moment. We have, however, chosen the floor – update in the next post!

Plan of attack – 11 simple steps to achieving your diy campervan

Right. These are the 11 simple steps needed to transform our maxi-taxi into a campervan so our 4-wheel adventures can take off in relative comfort. And style, obviously.

    1. Buy and fit laminate flooring. Involves removing upright bolts in floor that were used to secure the seats (and which I keep treading on), fitting chipboard, laying the underfloor insulation and then fitting the laminate on top. Having spent only 20 minutes in sauna-like conditions measuring up the van yesterday, we’re going to skip the underfloor heating at this stage.
    2. Order and fit toilet. The size of the toilet will dictate where the three surrounding ‘modesty’ screens will sit, and how much space we’ll then have for the kitchen. [note: The bathroom will also be accessible from the rear door of the van, which means we can empty the waste water from the sink and remove the cassette from the toilet. This also means we can get a bit of a through draft into the van when the door’s open. There will be a screen next to the toilet so it’s not visible through the back door, but fitting a wall next to the basin would reduce the bathroom width by about 10cm so we’ll just have a blind on the glass instead. One that’s dust-repellent, anti-static and easy to wash, of course. If such a thing exists?? (sorry, in-jokes are probably considered very poor blogging etiquette).]
    3. Order and fit fridge, freshwater tank (which will go under the kitchen sink) and waste tank (which will sit under the bathroom sink – we can then open the back door of the van and empty water from the valve at the back of the wastewater tank, just as we can remove the cassette from the toilet on the opposite side of the bathroom). Also order and fit smaller (2.5kg) gas bottle and casing, which will sit underneath the seating next to the stove.  Fitting the big ticket items early on lets us see how much space we have for everything else.
    4. Joinery – build cupboards / drawers which will go underneath the seating and underneath the stove and sink in the kitchen. And the sink in the bathroom. Also need to fit extra panel to the side of the seating which will slide out to form the bed, fit laminate onto wall between kitchen and bathroom, and incorporate the door.
    5. Order and fit water heater and water pump. Ideally these would go on the left-hand side of the van underneath the sink but that side is already heavy with both water tanks, so to distribute the weight a bit, we’ll put the water heater on the right-hand side under the stove, and run a pipe underneath the flooring to the freshwater tank.
    6. Finish bathroom – install basin, do tiling around toilet and basin.
    7. Figure out wiring and locate batteries – not sure if we’ll need one or two at this stage – but they’ll sit alongside the battery charger underneath the seating behind the driver’s seat.
    8. Electrics – fit and connect lighting, connect water heater, move speakers (currently providing piped music to the bathroom) to the middle of the van and install 3 ceiling vents.
    9. Fit work surfaces in kitchen, install sink and stove and connect to gas (will need help with this bit).
    10. Upholstery – fit seating in living area.
    11. Interior design – fit blinds and/or gingham curtains, commission surfer-chic artwork, casually scatter cushions around seating.


We’ve chosen the hottest day of the year so far to start on the flooring…

Paul resorting to desperate measures to find some shade


The hardboard layer and insulation went down well, and we’re ready to lay the laminate flooring next weekend. Again, let’s make it clear when I say ‘we’ – Paul is doing all the physical stuff here. I have joined in the shopping excursions, but otherwise have been taking photos from the sidelines and occasionally offering helpful advice at critical moments. Which is also an important role; we should all play to our strengths.

In need of a(nother) day off

I’ve decided that maintaining a blog is actually a great way to chivvy you along with whatever project you’re blogging about, just so you have something to post. Unfortunately, no amount of chivvying is going to increase the likelihood that any of our suppliers will open beyond the hours of 10-4 Mon-Fri so we can actually visit them. Paul raced back from work yesterday to see a cabinet maker who could potentially supply all the wood we need for the campervan, only to find he had already closed grrr. And as we have barely worked a full week since early December due to various public holidays and natural disasters, a day off is not looking very likely. At this rate I’m going to have to start on the gingham curtains so I have something to blog about. Is gingham surfer chic?

Online ordering is overrated

This morning we drove to a few suppliers of all things campervan whose warehouses are scattered around Brisbane. They pretty much stocked everything we’ll need throughout the project from solar-powered ceiling fans and whistling tin kettles to the more essential batteries, switches and sockets. There was so much choice we ended up leaving with nothing, but at least we know the range they have available now, and can use their catalogue to make a full list for each stage of the build.  And having seen some of the prices ($850 for a toilet, $1200 for a pint-sized fridge and $3000 for an awning!) there may be many stages all quite far apart unless we can negotiate some sort of bulk discount. They even charged $2 for their catalogue!

The warehouses are mostly in industrial parks a fair distance away, so it was great when one of the guys there said we could order online (despite being perfect mail order businesses, some of these places don’t even have a website). ‘Of course, the prices aren’t displayed online though’, he continued. Ah. That might make ordering a bit tricky then. Apparently, this is just a different version of online ordering, where you decide what you want from the website, and then go to the shop to place an order. I’m not sure it’s going to catch on.

12 grey bus seats sitting in a garage

In its previous incarnation, the campervan was used by ABC Childcare in Western Australia to ferry children around, and as such, was fitted out as a 14-seater mini-bus. When we bought the van, the owner kindly removed all 12 rear seats, and they’d been cluttering up our garage ever since. Originally destined for the tip, they were actually in near-perfect condition so at the last minute I thought I’d try them on eBay. I couldn’t imagine there’d be an active market for 12 old bus seats (retro dining furniture anyone?) but to our surprise, they attracted a lot of interest almost immediately. We had 8 people watching on the first day, and for an eBay virgin, this was most exciting. Admittedly, most people only wanted to buy one, but I thought there would be even less demand for 11 old bus seats so we held out, and pretty soon someone bought all 12 for $350!

The couple that came to pick them up had also converted a campervan and were about to drive it to Perth (they had to be there in 8 days – eek!) when their son decided to join them, so they needed to fit an extra seat for him.  They were planning to relist the other 11 seats when they returned, but at least they’re now out of our garage, and we can put the money we made towards our gourmet kitchen (i.e. the grill).

This was how the van originally looked with all its rear passenger seats (carsales.com.au)


Waiting for a home

The Queensland floods

This post is not strictly related to the van but being a Queensland blog, I can’t neglect to mention the devastating floods that have affected much of the state in the last few weeks. And it does explain why progress on the van has stalled recently.

It had rained almost non-stop since November, a trend which continued over Christmas (when we were overseas and facing our own weather dilemmas in the form of blizzards and dysfunctional airports) and, if anything, seemed to intensify in the new year. Brisbane rain can be fairly ferocious so we hardly even left the house some weekends. Last Monday there was flash flooding at the train station, and I had to roll my trousers up to wade to the platform. Suede pumps were not the best choice of footwear that day.

And yet, despite this, we still had no inkling when we arrived at work last Tuesday that we’d be evacuated within a couple of hours. This is the wet season after all. But our office block is opposite the Brisbane River, which was rising quickly and threatening to burst its bank that afternoon. It all suddenly felt quite dramatic as people crammed onto the usually empty 11am train out of the city to check their homes / round up cattle and, in many ways, to make the most of half a day off. Because I don’t think we realised at that stage how quickly it would escalate into something so prolonged and catastrophic. By the time I got home, most TV channels had constant news coverage – which then continued for several days.

Brisbane river suburbs (Brisbanetimes.com.au)


Riverside apartments (Brisbanetimes.com.au)

Thankfully we live well away from the river and at no risk of flooding. Of course, thousands of people living in the inner Brisbane suburbs and out west in Ipswich, Toowoomba and the Lockyer Valley were not so lucky. Sadly, there have so far been 20 deaths with more people still missing, and billions of dollars’ worth of damage. The enormous clean-up effort has now started and has seen thousands of volunteers turn out to help – the community spirit has been immense.

Paul returned to work  last Friday, but  my office block is not due to reopen til 24th January due to extensive flooding around the electrics in the basement.

Central business district (Brisbanetimes.com.au)


Usually the prospect of two weeks off work would be fairly appealing, but it’s been a strange time. We registered for the volunteer effort straight away, but they have been so inundated (no pun intended) with people offering help, we haven’t been contacted yet. Living 30km outside the city also means we can’t just walk out with a mop and bucket and get stuck in (although I did drive into the city yesterday to try just this and felt a little conspicuous walking around a neighbourhood I didn’t know with my broom!) So we’ve offered support to friends where we can, and will turn out for the community clean-up day on Sunday. In the meantime, we’ve tried to stay cool (because the sun has finally appeared and it is roasting!) and keep busy at home. Somehow, just relaxing outside with a book hasn’t seemed right when people just down the road are still sweeping mud out of their homes, so, in sympathy I suppose, I’ve cleaned the house from top to bottom (I felt that should even include the oven), decluttered the wardrobes, sorted through 3 years worth of uni papers, had a cosmetics audit and a handbag amnesty and taken bags of stuff to Vinnies.  It has been quite therapeutic. By next weekend, most people will have returned to work and I can justify tackling more ‘normal’ activities, like focusing back on the van. And maybe lying in the sun for ten minutes.

Buying the van – what happens next?


Tues 11 October 2010

So after a seemingly endless, global search that saw us trek out to car yards as far away as Strathpine and Acacia Ridge, we’ve finally found the perfect van, hurrah!!

Well, I say we…

Paul had very precise requirements, and was starting to lose hope that there were any Toyota commuter vans in Queensland that represented exactly what he wanted (i.e. diesel, automatic, low mileage, low cost, no signage emblazoned on the side, one careful lady owner etc). We had seen and discounted quite a few for various reasons, and unfortunately every salesman we encountered had the same reaction, exclaiming with a sharp intake of breath and a shake of the head that they were as ‘rare as hen’s teeth’.

Not to be defeated, I logged on to carsales.com last Friday morning with the now ingrained list of requirements, and at the top of the list was a lovely looking van. It was petrol, not diesel, but other than that, it seemed exactly right. A 2006 model with only 41,000 km on the clock and best of all, it was $32,000 – $3,000 less than we thought we’d have to pay. It had somehow slipped through the cracks on Paul’s search, but he agreed it looked promising. That evening, Paul rang the contact number listed, and the guy said he had theoretically already ‘sold’ it to two people who were scrambling to arrange their finance, but if we could promise cash the following day, it was ours. Well. That was a turn up for the books.

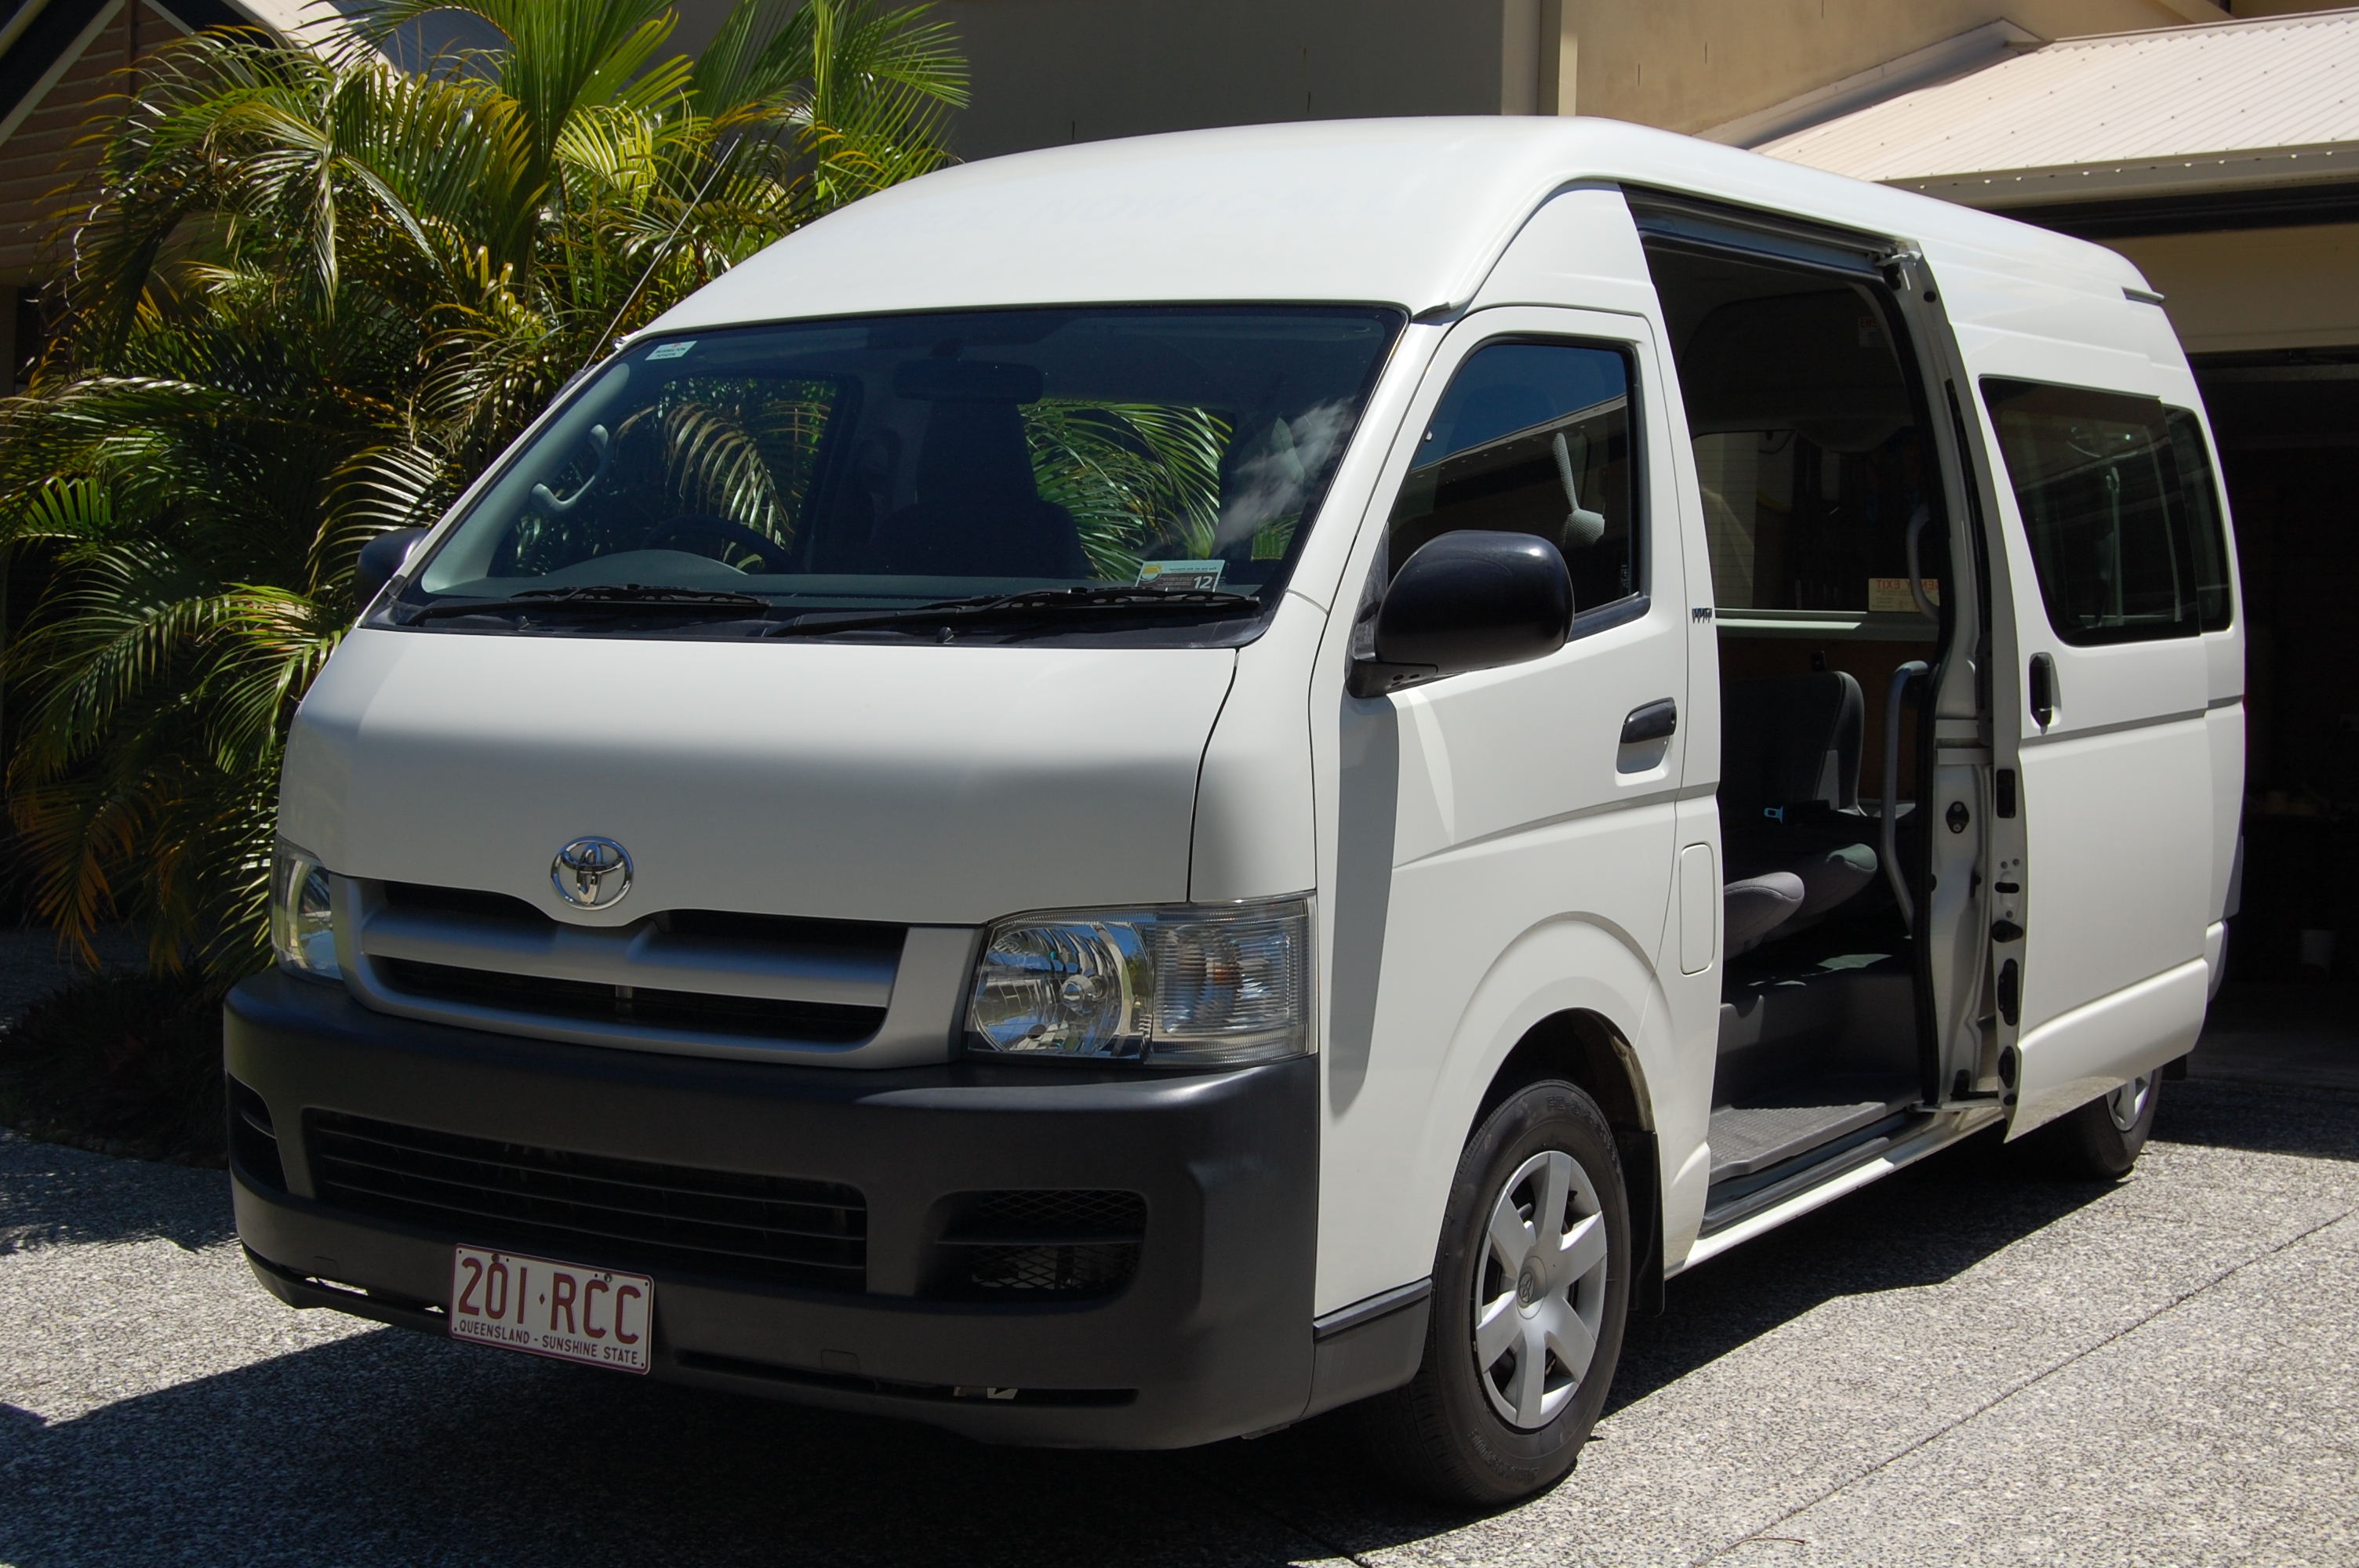
Keen not to be gazumped ourselves, on Saturday morning we drove in torrential rain to yet another interesting Brisbane suburb, Rocklea, where we met the owner in a printing & signage workshop where the van was being stored. It had recently come across from WA, where it was owned by ABC Childcare. It wasn’t too good to be true, it was a beautiful van – clean and shiny with no dents and hardly any wear inside. It also came with a free fire extinguisher!

We gave it a thorough test drive in the garage, and then dashed to the bank down the road for a cash deposit before he could sell it to anyone else.

The owner was great, and promised to arrange for all 12 rear seats to be taken out, get it certified as a 2-seater vehicle and also re-register it in Queensland – all without charging any extra!

Sat 16 October
Paul drove back to Rocklea yesterday to transfer the rest of the money and drive the van home – sans 12 rear seats. Luckily it fits perfectly down the side of the house. So here it is: ooooh, aaaaah.

Campervan


Plenty of room!

Sat 23 October
The first job was to get the windows tinted, which Paul arranged at Auto-Tint in Capalaba. They used the darkest legal tint and promised no bubbles. It looks pretty good:


In the afternoon we also joined 5,000 other people wearing this season’s pac-a-mac at the Brisbane Caravan and Camping Sale. It was good to check out the various fixtures and fittings, including lighting and sinks, that we can use in the van, although admittedly we spent most of our time swooning at the fantastic Winnebagos that slept about 16. Our van does not resemble a Winnebago. We found a conversion company who were helpful, and can do either the whole van or just the tricky bits. The look on Paul’s face suggested he would quite like someone to do the whole van, so we had to make a swift exit.

At least we can get a quote for just doing the cutting work to install the gas bottle and ventilation.

Fri 29 October
It’s all systems go. One of Paul’s colleagues has done a 3-D design of the van, which shows everything should fit in well, with our living / dining / sleeping area at the front, a kitchen in the middle with hob on one side and sink on the other, and a tiny bathroom at the back:

Sun 31 October
Paul spent all day yesterday building a mock frame inside the van, to show where each bit will sit. Here you go:

Guidelines for each section

Guidelines for each section

Guidelines for each section


The only issue that keeps rearing its head is the height of the van inside. It’s 156m high, and because I’m 170cm and Paul is a bit taller, it means that spending any length of time standing or walking through induces a rather stiff back and neck. One option is to raise the roof an extra foot or so with either a hard or soft pop-top so we can freely move around, but Paul is not keen.

Cutting the roof off would obviously be a major job, fairly expensive and not particularly one for the driveway. It would decrease the rigidity inside and make it hard to have an internal wall separating the bathroom (particularly with a soft-top), reduce fuel efficiency and limit the number of multi-storey car parks we could frequent.

Of course, we won’t be spending long periods standing or walking inside however high the ceiling is. But it seems a shame to spend time building a lovely kitchen and bathroom if it’s then too uncomfortable to use them. Anyway, lots of people have tried to persuade Paul and he is having none of it – he says I can fry his breakfast kneeling down at the cooker. Hilarious.
Sun 7 November
We’ve had no luck with the conversion company, who as it turned out were not interested in just doing part of the job. So Paul’s going to tackle it all himself – any excuse for another trip to Bunnings to buy some shiny new tools.

He ordered a stainless steel box for the 9kg gas bottle, which arrived this week. The plan was for it to sit underneath the seating bench but it’s a bit tall, and means when we put the seat cushion on top, the seat will be at window height. To avoid passers by getting a perfect view of our derrieres through the (albeit beautifully tinted) windows as we sit and enjoy our cups of tea, we might have to get a smaller gas bottle, that fits under the seats as we planned. A 2.5kg bottle should be fine just for weekends away anyway.

Sun 20 November
There were a few sweaty palms today, as Paul had to cut a nice round hole in the side of the van for the electrical power point. I can’t imagine there’s much demand for minibuses with portholes, so there’s no going back now!

Still, it went beautifully: